Back
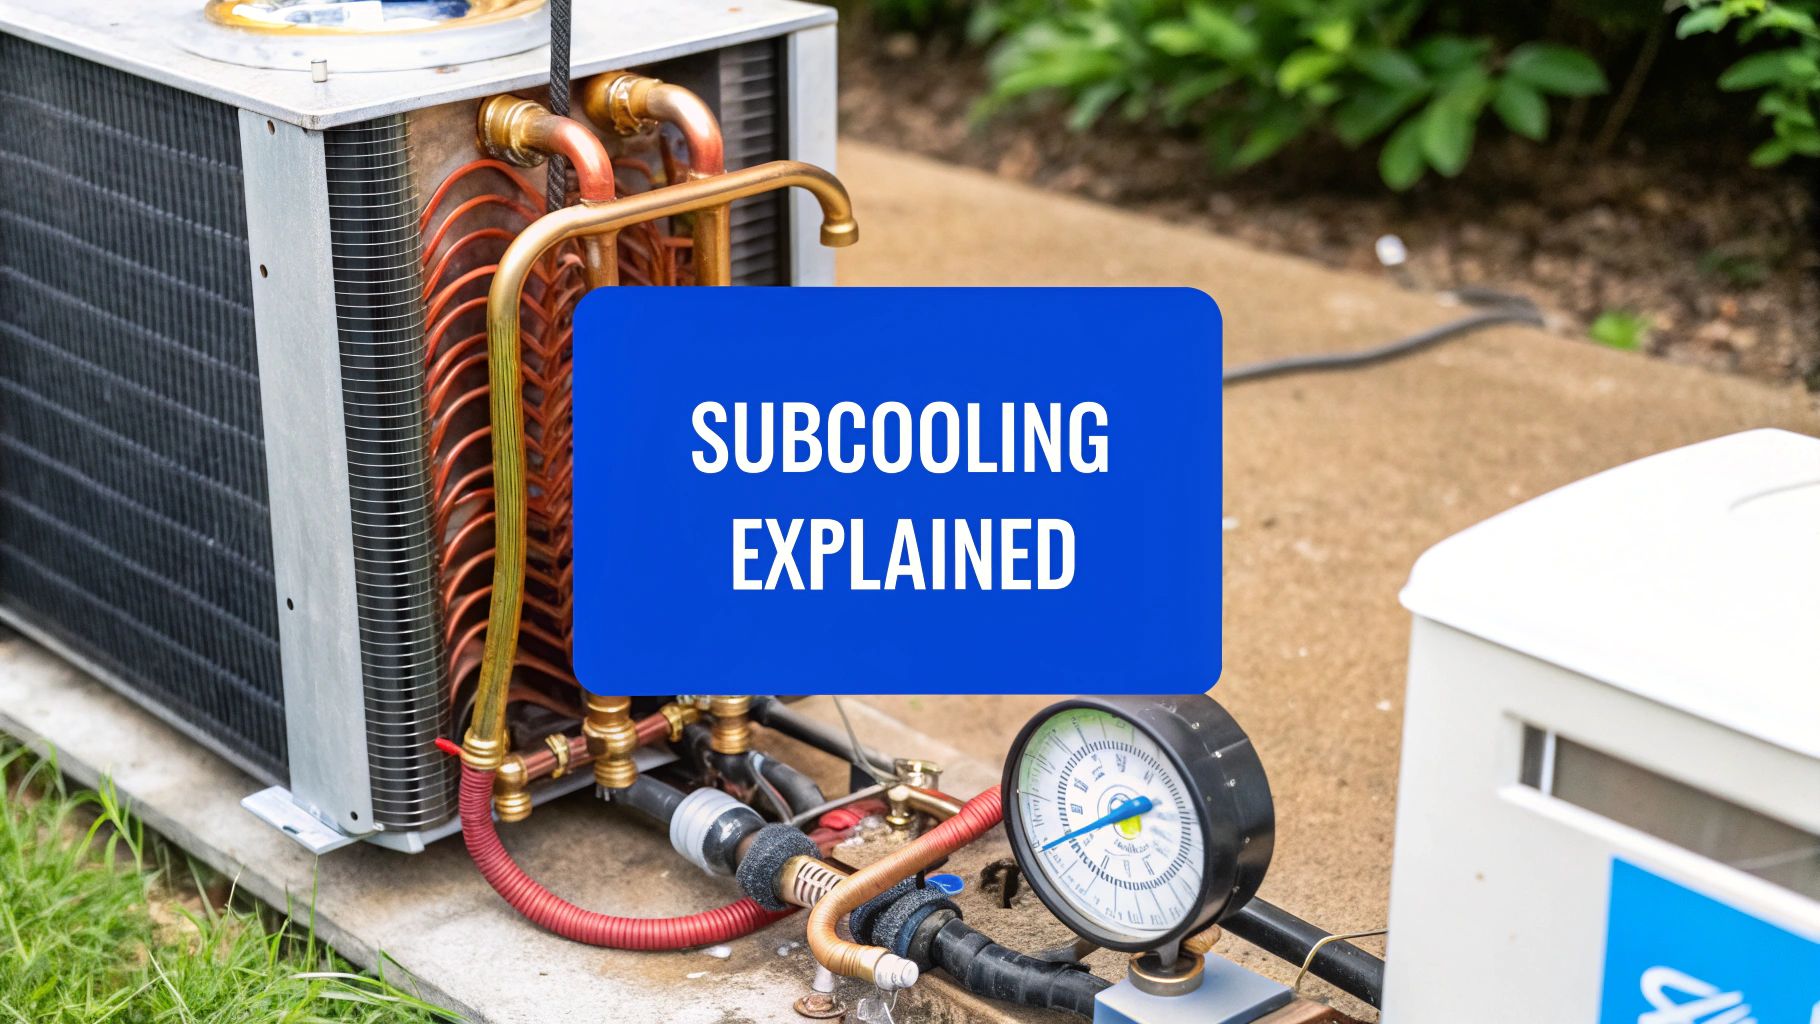
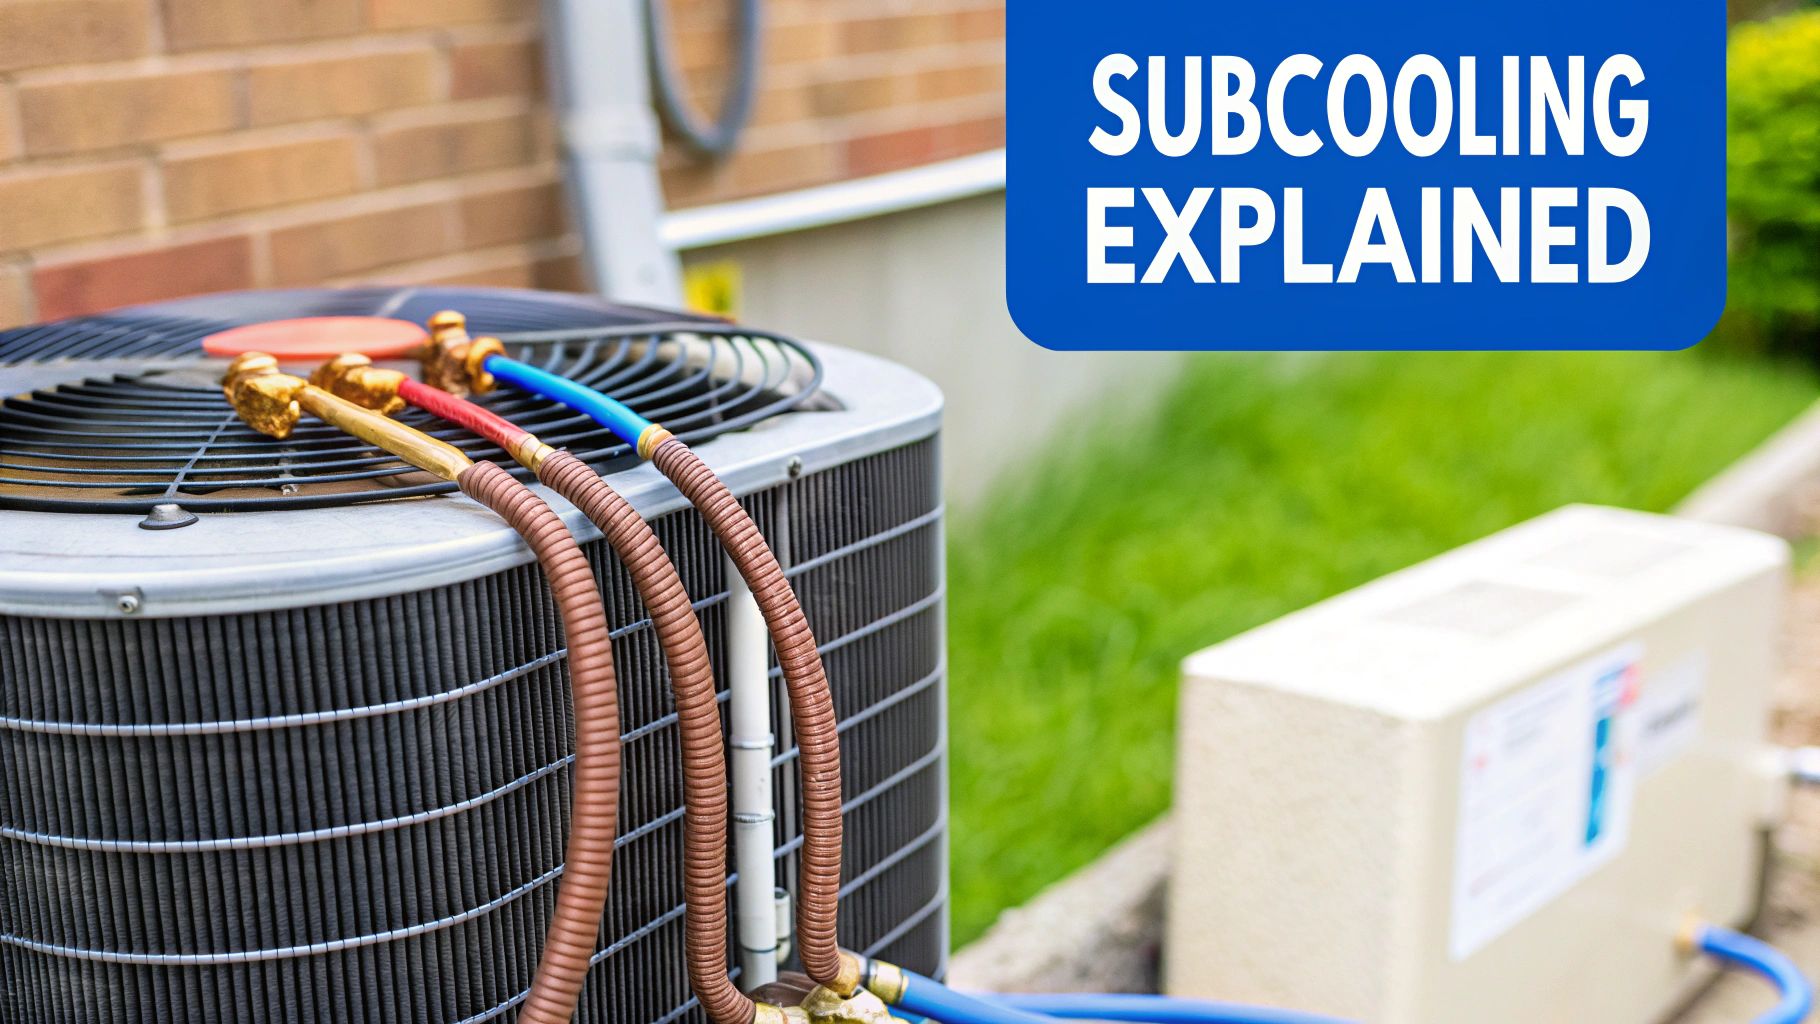
What is Subcooling in HVAC? Essential Guide for Efficiency
Learn what is subcooling in HVAC, why it matters, and how to measure and diagnose subcooling issues to optimize your system's performance.
Aug 26, 2025
Aug 26, 2025
Table of Contents
Table of Contents
NOTE: This content is for informational purposes only. EPS Controls assumes no liability for what you do with this information—consult a qualified HVAC technician before making changes.
NOTE: This content is for informational purposes only. EPS Controls assumes no liability for what you do with this information—consult a qualified HVAC technician before making changes.
At its core, subcooling is the process of cooling the liquid refrigerant below its boiling point after it has already condensed from a gas to a liquid in the outdoor unit.
Think of it as a quality control step. It’s an extra bit of cooling that guarantees the refrigerant is 100% solid liquid—no lingering vapor bubbles—before it heads inside your home to start absorbing heat. This simple step is absolutely vital for getting the most efficiency out of your system and protecting its most important parts.
Decoding Subcooling in Your HVAC System
To really get what subcooling is, you have to think about how liquids and gases behave. Every liquid has a specific boiling point, which HVAC pros call its "saturation temperature." At this exact point, it starts turning into a gas. For the refrigerant in your AC, this temperature isn't fixed; it changes depending on the pressure it's under.
The magic happens in your outdoor unit, the condenser. Hot, high-pressure gas refrigerant gets sent there, releases its heat to the outside air, and condenses back into a liquid. But we can't stop there. The subcooling process kicks in right after, continuing to cool that newly formed liquid just a little bit more, pushing it safely below its saturation point. This creates a "safety margin" of cold, ensuring only pure liquid makes it to the next stage.
The Core Purpose of Subcooling
So, why go to all this trouble? It all comes down to a small but mighty component inside your home's air handler: the expansion valve. This valve is designed to handle one thing and one thing only: liquid refrigerant.
When it gets a solid, uninterrupted stream of liquid, it can precisely control the pressure drop that creates the intense cooling effect needed to pull heat and humidity out of your indoor air. If even small amounts of gas get through, the system’s cooling power plummets.
In technical terms, subcooling is the difference in temperature between the refrigerant's saturation point and its actual measured temperature as it leaves the condenser. As the HVAC experts at PureEcoInc.com explain, this measurement is a direct window into the system's refrigerant charge and overall health.
That small temperature drop tells a technician almost everything they need to know.
To help put these concepts together, here's a quick breakdown of the key players involved in the subcooling process.
Subcooling Key Concepts at a Glance
Term | Simple Definition | Why It Matters |
|---|---|---|
Refrigerant | The special fluid that absorbs and releases heat. | It's the lifeblood of your AC system; it does all the heavy lifting for cooling. |
Condenser | The big outdoor unit that dumps heat outside. | This is where hot gas refrigerant sheds its heat and turns back into a liquid. |
Expansion Valve | A small indoor part that regulates refrigerant flow. | It needs 100% liquid refrigerant to create the intense cooling effect for your home. |
Saturation | The precise temperature where a liquid is about to boil. | Subcooling is all about pushing the liquid refrigerant safely below this critical point. |
Understanding these fundamental pieces makes it much easier to see how subcooling fits into the bigger picture of your home's cooling cycle.
The Refrigeration Cycle and Where Subcooling Fits In
To really get why subcooling matters, you have to understand the journey refrigerant takes through your system. It’s a continuous loop with four key stops, and at each stop, the refrigerant changes form to either grab heat or get rid of it.
The whole thing kicks off at the compressor, which is basically the heart of the system. It takes in cool, low-pressure refrigerant gas and squeezes it hard. This compression spikes both the pressure and the temperature, turning it into a super hot, high-pressure gas that’s ready for the next step.
The Condenser: Where Heat Gets Dumped
That hot gas gets pushed from the compressor into the condenser coil, the big unit sitting outside your house. Think of it like a radiator in a car. A large fan blows outside air over the coil's fins, and as the hot refrigerant gas snakes its way through, it starts shedding its heat into that air.
As it cools, the refrigerant hits its saturation point—that specific temperature where it starts condensing from a gas back into a liquid. This is a critical phase change. When a gas becomes a liquid, it releases a massive amount of stored energy, which is why you feel that blast of hot air coming from your outdoor unit.
Subcooling is the final, crucial step that happens right at the end of this process. Even after all the refrigerant has turned into a liquid, it continues to cool down a few more degrees. This creates a "safety buffer" of cooler, denser liquid, ensuring no stray vapor bubbles make it to the next stage where they can wreck performance.
That extra bit of cooling is exactly what we’re measuring.
The Final Steps Inside Your Home
Now, we have a high-pressure, subcooled liquid. It travels through the liquid line into your indoor unit, where it hits the expansion valve (sometimes called a metering device). This valve is just a tiny, precise nozzle.
When the liquid refrigerant is forced through this nozzle, its pressure drops dramatically and instantly. This rapid expansion makes the refrigerant intensely cold as it sprays into the last stop on its tour: the evaporator coil.
Evaporator Coil: This is tucked inside your home's air handler, and it's where the magic really happens. As your indoor air is blown across the coil, the frigid refrigerant inside absorbs the heat right out of it.
Boiling and Vaporizing: All that heat it soaks up causes the refrigerant to boil and turn back into a cool, low-pressure gas.
Return to Compressor: From there, the gas flows back to the compressor, carrying the heat it just pulled out of your house, and the entire cycle starts all over again.
This constant loop is what keeps your home cool. Understanding what subcooling is in HVAC is all about seeing its role in perfecting the refrigerant's liquid state right before it gets to work making your air comfortable.
How Proper Subcooling Boosts HVAC Efficiency
It's one thing to understand the textbook definition of subcooling, but it's another to see what it actually does for an HVAC system. Getting the subcooling right isn't just some technical box to check; it’s one of the most direct ways to improve a system's efficiency, extend its lifespan, and lower your energy bills.
When your system has the perfect amount of subcooling, it’s primed to deliver maximum cooling power. Think of it like a perfectly hydrated athlete ready for a race. That system doesn't have to work as hard to cool your home. It hits the set temperature on your thermostat faster, which means shorter run times and less electricity used.
Maximizing Cooling Capacity and Protecting the Compressor
The whole point of subcooling is to make sure a solid column of liquid refrigerant—with no vapor bubbles—arrives at the indoor expansion valve. This is absolutely critical for peak performance. If even a small amount of vapor, known as flash gas, gets into that valve, it’s a big problem.
That flash gas takes up precious space that should be filled with dense liquid refrigerant. The result? The system’s cooling capacity drops like a rock. The unit is forced to run longer and harder to do the same job, which strains components and just flat-out wastes energy.
A correctly charged system with optimal subcooling ensures the expansion valve operates exactly as designed, providing a consistent and powerful cooling effect. This not only enhances comfort but also acts as a critical protective measure for the system's most vital and expensive component—the compressor.
By preventing flash gas, proper subcooling also guarantees the compressor gets only cool vapor back from the evaporator coil. If liquid refrigerant were to flood back into the compressor, it could cause catastrophic damage. Smooth, predictable operation like this dramatically reduces wear and tear, helping your entire HVAC unit last longer.
The Financial Impact of Precise Subcooling
The efficiency gains from correct subcooling aren't just theoretical numbers on a spec sheet. They translate directly into real money saved. When an air conditioner is running at its best, it simply uses less energy to keep you comfortable.
Field data from countless HVAC service calls confirms it: systems with the correct refrigerant charge and subcooling can cut energy use by 5% to 15%. Over the course of a long, hot summer, that adds up to a noticeable drop in your utility bills. You can dig deeper into how different charging methods affect performance by reading the full explanation on ACServiceTech.com.
In the end, hitting that manufacturer-specified subcooling target is one of the most effective things you can do to keep your HVAC system running efficiently, reliably, and affordably for years. It’s far more than just a measurement; it's a vital sign of your system's overall health.
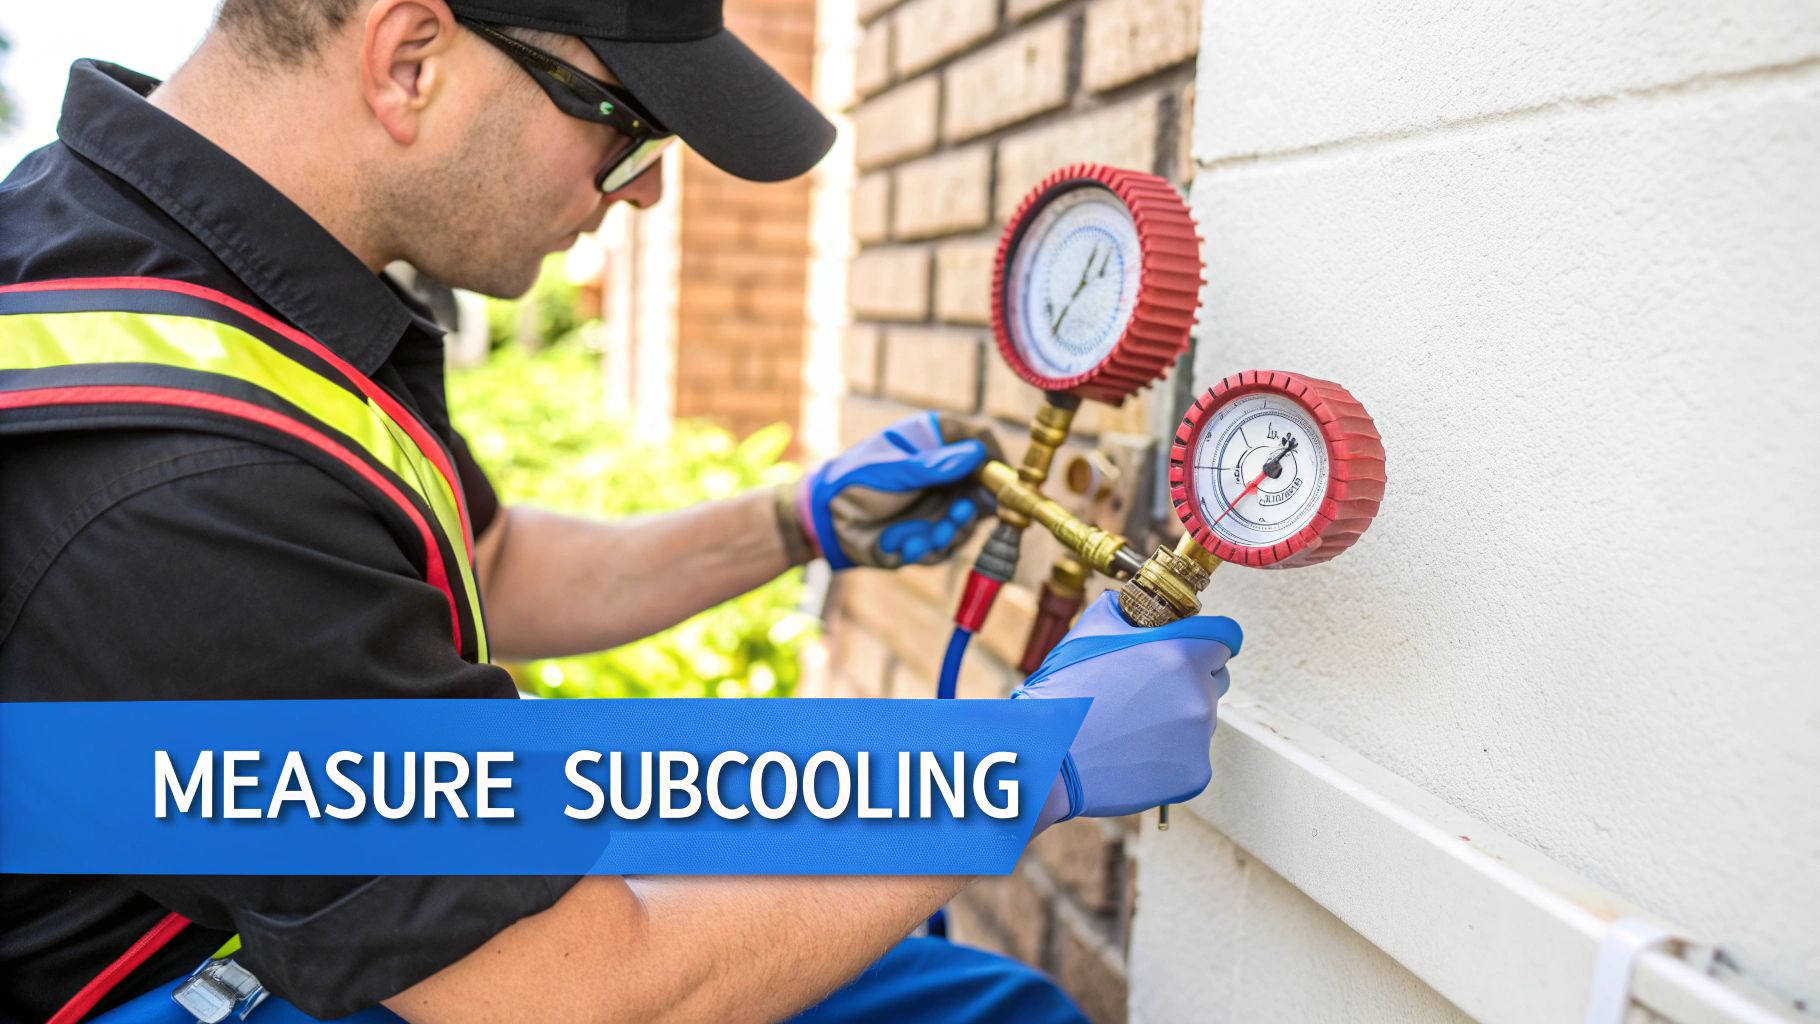
Measuring Subcooling Like a Pro
Alright, we’ve covered the "why," so let's get into the "how." Measuring subcooling is a precise task, but it’s far from complicated. Think of it like taking a system's blood pressure—it's a routine check for technicians that gives them a direct window into the unit's health and, most importantly, its refrigerant charge.
The whole process boils down to a simple but powerful formula. By comparing two key temperatures, a technician can pinpoint the exact subcooling value and figure out precisely what’s going on inside the system.
The Essential Tools for the Job
Before you can get an accurate reading, you need the right gear. Each tool here has a specific job to do, and getting a reliable measurement depends on using them correctly.
To measure subcooling accurately, you'll need a few key items. Here’s a quick breakdown of the essential toolkit.
Subcooling Measurement Tools and Their Purpose
Tool | Primary Function | Pro Tip |
|---|---|---|
Gauge Manifold | Connects to the system's service ports to measure the refrigerant pressure on the high-pressure (liquid) side. | Always purge your hoses to prevent air and moisture from contaminating the system. |
Temperature Clamp/Probe | Clamps securely onto the liquid refrigerant line to get a precise, real-time temperature reading of the pipe's surface. | Ensure the clamp makes solid contact with a clean section of the pipe for an accurate reading. |
Pressure-Temperature (P/T) Chart | Converts the pressure reading from your gauges into the corresponding saturation (boiling) temperature for a specific refrigerant. | Most digital manifolds have P/T charts built-in, which saves time and reduces the chance of errors. |
These tools work together to give you the two numbers you need for the final calculation.
At its core, the formula is refreshingly simple:
Saturation Temperature – Actual Line Temperature = Subcooling
This one calculation tells the whole story. It confirms how many degrees the refrigerant has cooled below its boiling point, ensuring there’s a solid column of liquid ready to feed the expansion valve and get to work.
A Step-by-Step Practical Example
Let's walk through a real-world scenario with a common refrigerant, R-410A, to see how it works.
Connect the Gauges: First, a technician connects the high-pressure (red) hose from the manifold gauges to the liquid line service port on the outdoor condenser unit.
Measure the Pressure: After letting the system run for at least 15 minutes to stabilize, they check the high-side pressure. For our example, let's say the gauge reads 318 PSIG.
Find the Saturation Temperature: Using a P/T chart for R-410A, the technician looks up 318 PSIG. This pressure corresponds to a saturation temperature of 100°F. This is the point where R-410A would boil if any more heat were added.
Measure the Actual Temperature: Next, they place the temperature clamp on the liquid line, right near the service port. The digital display shows the pipe's actual surface temperature is 90°F.
Calculate Subcooling: Now for the easy part. Just plug the numbers into the formula: 100°F (Saturation Temp) - 90°F (Actual Temp) = 10°F of subcooling.
This result, 10°F, tells the technician the system is properly charged, assuming the manufacturer's target is around that number.
This simple visual helps tie all these steps together into the broader optimization process.
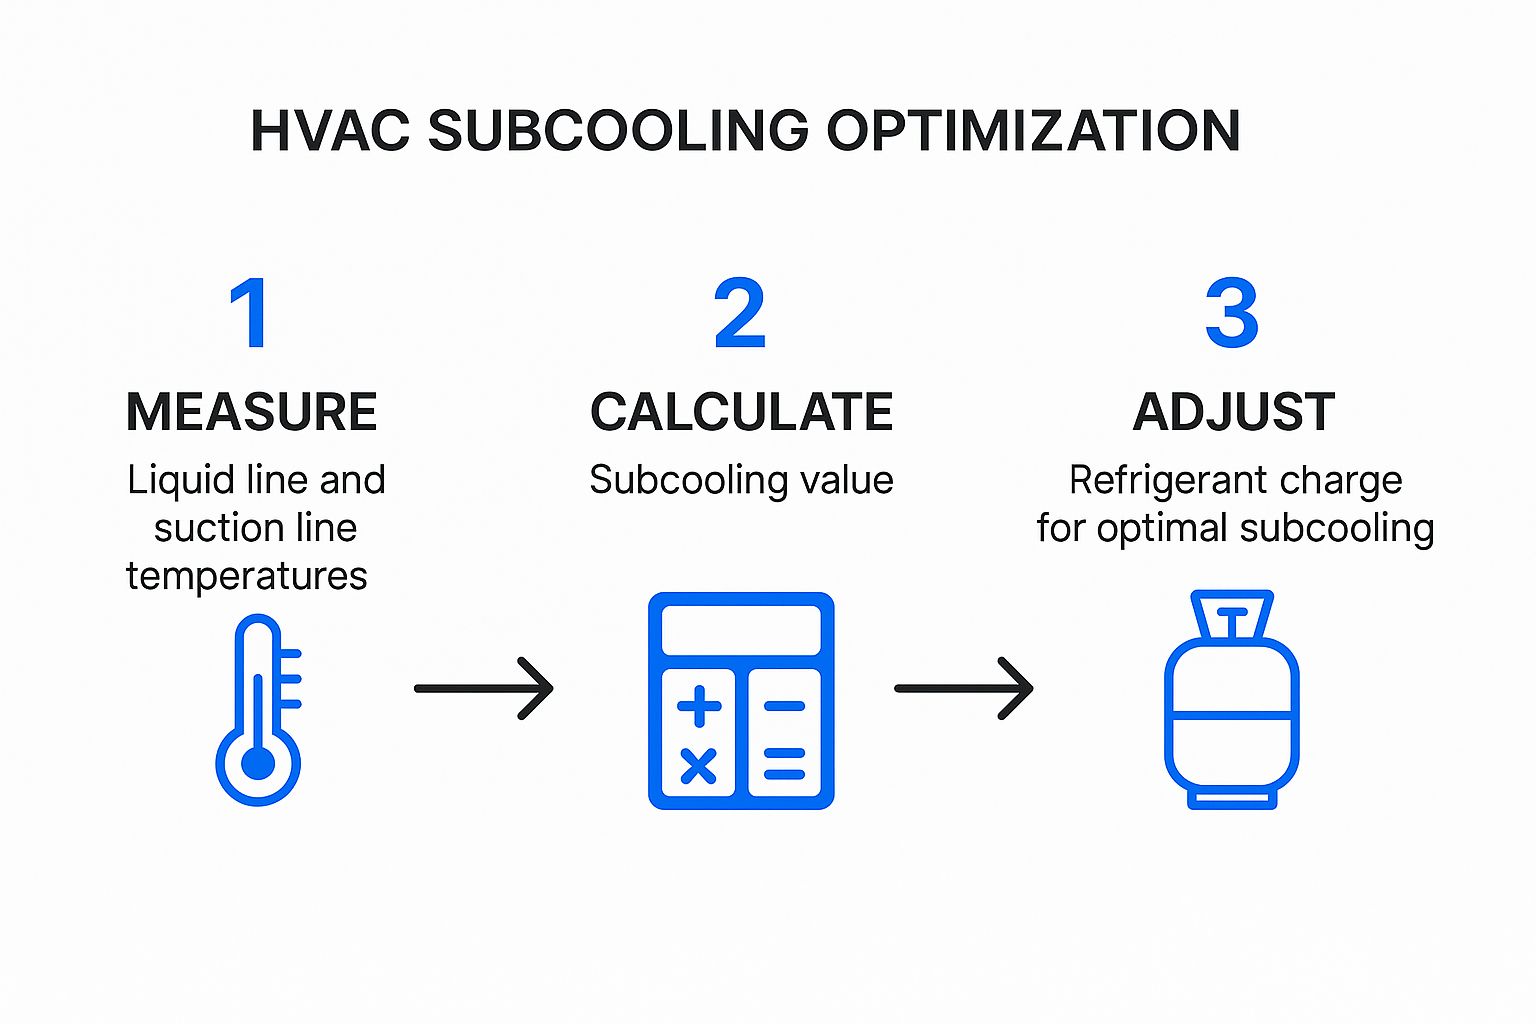
As you can see, measuring is just the first step. Once you know the subcooling value, you can confidently make any necessary adjustments to the refrigerant charge to hit the manufacturer's target and get the system running at peak performance.
What Your Subcooling Numbers Are Telling You
A subcooling reading isn't just another number on a gauge; it's one of the most direct health reports you can get for an air conditioning system. When a technician calculates this value, they get an instant snapshot of the unit's condition, allowing them to diagnose problems with remarkable accuracy.
But what does a high, low, or ideal reading actually mean?
Every piece of HVAC equipment has a "target" subcooling value set by the manufacturer, which you can usually find right on the unit's data plate. This target is the sweet spot for peak performance and efficiency. Nailing that number means the refrigerant charge is just right and the whole system is running exactly as it should be.
While the ideal range can vary by model and conditions, many systems operate best with 8°F to 12°F of subcooling. Think of this as the "green zone" on your system's health gauge.
Interpreting a Low Subcooling Reading
When your subcooling reading comes in well below the manufacturer's target, it’s a major red flag. In almost every case, low subcooling points to an undercharged system. And an undercharged system almost always means there's a refrigerant leak somewhere.
If the refrigerant level is too low, there simply isn't enough liquid refrigerant in the condenser to adequately cool down after it has condensed from a gas. This creates a cascade of problems:
Poor Cooling: The system struggles to absorb heat from inside your home.
Flash Gas: Bubbles of refrigerant vapor can form before the liquid reaches the metering device, which kills efficiency.
Compressor Strain: The compressor has to work overtime to try and compensate, leading to excessive wear and a much shorter lifespan.
A low subcooling number tells a technician they need to find and fix that leak before even thinking about adding more refrigerant.
A low subcooling value is like a car engine running low on oil. It might still turn over for a little while, but it's under incredible strain, and catastrophic failure is just around the corner if you don't address it immediately.
Decoding a High Subcooling Reading
On the other side of the coin, you have a high subcooling reading. This almost always means the system is overcharged with refrigerant. This often happens when a less experienced technician adds too much "Freon" during a service call, accidentally creating a new and equally dangerous problem.
With too much refrigerant in the system, liquid starts to back up into the condenser coil. This "liquid stacking" essentially floods the coil, leaving less surface area for the heat exchange process to happen. As a result, system pressures can climb to dangerous levels.
An overcharged system can cause severe compressor damage, tank your efficiency, and send your energy bills through the roof. It's a serious condition that requires a certified technician to safely recover the excess refrigerant and restore the proper charge.
Putting Your Subcooling Numbers to Work
Alright, so you’ve got your subcooling reading. What now? Think of it like a vital sign for the HVAC system. A good reading means a clean bill of health, but a bad one tells you exactly where to start looking for the problem.
Let's walk through how a pro turns those numbers into real-world fixes. This isn't just about getting the cold air blowing again; it’s about protecting the heart of the system—the compressor—and keeping energy bills from creeping up. Getting it right prevents a small hiccup from turning into a catastrophic failure.
What to Do When Subcooling Is Low
A low subcooling reading is almost always a dead giveaway for one thing: the system is low on refrigerant. And refrigerant doesn't just evaporate—if it's low, there's a leak somewhere.
Just dumping more refrigerant in is like putting air in a tire with a nail in it. It's a band-aid, not a fix. A real technician knows the right way to handle it.
Hunt Down the Leak: First things first, you have to find the source. This means breaking out the tools of the trade—electronic "sniffers," UV dye, or even a simple soap bubble solution. Leaks often hide in plain sight at flare fittings, on corroded coils, or at those pesky little Schrader valves.
Repair and Recharge Properly: Once the leak is patched, the job's not done. The system has to be completely evacuated with a vacuum pump to pull out all the air and moisture that got in. Only then can the technician weigh in a precise charge, watching the subcooling number climb until it hits that sweet spot designated by the manufacturer.
An undercharged system is a compressor killer. It has to work overtime to produce less cooling, which is a recipe for premature failure of the most expensive part of the unit.
Fixing the Problem of High Subcooling
On the flip side, a high subcooling reading screams "overcharged!" Too much refrigerant has been added to the system. This creates dangerously high pressure in the condenser, putting an immense strain on the compressor. It's a serious issue.
The fix sounds simple, but it's a job that absolutely requires a certified pro.
The only way to correct an overcharge is to safely recover the excess refrigerant. This isn't a DIY task. It legally requires an EPA-certified technician to use a special recovery machine and a designated tank. They'll carefully pull out small amounts of refrigerant at a time, letting the system pressures stabilize and re-checking the subcooling until it drops back into the target range.
When It's Not the Refrigerant Charge
While the refrigerant level is the usual suspect 9 times out of 10, other system gremlins can mess with your subcooling. A restriction in the liquid line is a classic example.
If you have a clogged filter drier or a thermal expansion valve (TXV) that’s stuck, liquid refrigerant can get backed up. This will artificially inflate your subcooling reading, even if the charge is perfect. A seasoned technician knows not to jump to conclusions. They'll always check the superheat reading as well to get the full story before diagnosing these trickier mechanical failures.
Common Questions We Get About Subcooling
Even after you get the hang of the theory, a few practical questions always seem to pop up. Let's tackle some of the most common ones I hear from homeowners and new technicians to connect the dots between the textbook and what you actually see in the field.
What's the Difference Between Subcooling and Superheat?
Think of subcooling and superheat as two sides of the same coin. They're both critical measurements, but they tell you about what's happening at opposite ends of the air conditioning cycle. You really need both to get the full story on system health.
Subcooling is all about the liquid line. It tells you how much heat we've pulled out of the refrigerant after it has already condensed into a liquid in the outdoor unit. The goal here is simple: guarantee that 100% solid liquid gets to the metering device inside.
Superheat is the opposite, focusing on the suction line. It measures how much heat the refrigerant has absorbed after it has already boiled into a vapor in the indoor coil. Its job is to ensure 100% pure vapor makes it back to protect the compressor.
So, when you hear "subcooling," think high-pressure liquid leaving the condenser. When you hear "superheat," think low-pressure vapor returning to the compressor.
Can I Check My Own HVAC Subcooling?
I get this question a lot, and while it's fantastic that you're learning how your system works, this is one of those jobs you really need to leave to a pro. Taking an accurate subcooling measurement requires specialized tools like a good set of manifold gauges and a reliable temperature clamp—equipment most homeowners just don't have lying around.
But there's a much bigger reason: safety and legality. Handling refrigerants is tightly regulated, and you must have an EPA Section 608 certification to work with them. Trying to add or remove refrigerant without the right training and credentials isn't just illegal; it's genuinely dangerous and can lead to catastrophic equipment failure or serious injury. Always call a qualified HVAC technician for these checks.
Why Does the Target Subcooling Value Change?
You’ll notice that the ideal subcooling number isn't one-size-fits-all. That's because manufacturers engineer the target value for each specific piece of equipment.
The perfect subcooling reading depends on a bunch of factors, like the type of refrigerant being used (R-410A acts differently than older R-22), the unit's SEER rating, and the kind of metering device it has. A high-efficiency 20 SEER system will likely have a different target than a standard 14 SEER builder's model to hit its performance goals.
This is why you always check the manufacturer's data plate on the outdoor unit. It will tell you the exact subcooling target you should be aiming for. Guessing is a surefire way to hurt the system's efficiency or even cause damage.
At its core, subcooling is the process of cooling the liquid refrigerant below its boiling point after it has already condensed from a gas to a liquid in the outdoor unit.
Think of it as a quality control step. It’s an extra bit of cooling that guarantees the refrigerant is 100% solid liquid—no lingering vapor bubbles—before it heads inside your home to start absorbing heat. This simple step is absolutely vital for getting the most efficiency out of your system and protecting its most important parts.
Decoding Subcooling in Your HVAC System
To really get what subcooling is, you have to think about how liquids and gases behave. Every liquid has a specific boiling point, which HVAC pros call its "saturation temperature." At this exact point, it starts turning into a gas. For the refrigerant in your AC, this temperature isn't fixed; it changes depending on the pressure it's under.
The magic happens in your outdoor unit, the condenser. Hot, high-pressure gas refrigerant gets sent there, releases its heat to the outside air, and condenses back into a liquid. But we can't stop there. The subcooling process kicks in right after, continuing to cool that newly formed liquid just a little bit more, pushing it safely below its saturation point. This creates a "safety margin" of cold, ensuring only pure liquid makes it to the next stage.
The Core Purpose of Subcooling
So, why go to all this trouble? It all comes down to a small but mighty component inside your home's air handler: the expansion valve. This valve is designed to handle one thing and one thing only: liquid refrigerant.
When it gets a solid, uninterrupted stream of liquid, it can precisely control the pressure drop that creates the intense cooling effect needed to pull heat and humidity out of your indoor air. If even small amounts of gas get through, the system’s cooling power plummets.
In technical terms, subcooling is the difference in temperature between the refrigerant's saturation point and its actual measured temperature as it leaves the condenser. As the HVAC experts at PureEcoInc.com explain, this measurement is a direct window into the system's refrigerant charge and overall health.
That small temperature drop tells a technician almost everything they need to know.
To help put these concepts together, here's a quick breakdown of the key players involved in the subcooling process.
Subcooling Key Concepts at a Glance
Term | Simple Definition | Why It Matters |
|---|---|---|
Refrigerant | The special fluid that absorbs and releases heat. | It's the lifeblood of your AC system; it does all the heavy lifting for cooling. |
Condenser | The big outdoor unit that dumps heat outside. | This is where hot gas refrigerant sheds its heat and turns back into a liquid. |
Expansion Valve | A small indoor part that regulates refrigerant flow. | It needs 100% liquid refrigerant to create the intense cooling effect for your home. |
Saturation | The precise temperature where a liquid is about to boil. | Subcooling is all about pushing the liquid refrigerant safely below this critical point. |
Understanding these fundamental pieces makes it much easier to see how subcooling fits into the bigger picture of your home's cooling cycle.
The Refrigeration Cycle and Where Subcooling Fits In
To really get why subcooling matters, you have to understand the journey refrigerant takes through your system. It’s a continuous loop with four key stops, and at each stop, the refrigerant changes form to either grab heat or get rid of it.
The whole thing kicks off at the compressor, which is basically the heart of the system. It takes in cool, low-pressure refrigerant gas and squeezes it hard. This compression spikes both the pressure and the temperature, turning it into a super hot, high-pressure gas that’s ready for the next step.
The Condenser: Where Heat Gets Dumped
That hot gas gets pushed from the compressor into the condenser coil, the big unit sitting outside your house. Think of it like a radiator in a car. A large fan blows outside air over the coil's fins, and as the hot refrigerant gas snakes its way through, it starts shedding its heat into that air.
As it cools, the refrigerant hits its saturation point—that specific temperature where it starts condensing from a gas back into a liquid. This is a critical phase change. When a gas becomes a liquid, it releases a massive amount of stored energy, which is why you feel that blast of hot air coming from your outdoor unit.
Subcooling is the final, crucial step that happens right at the end of this process. Even after all the refrigerant has turned into a liquid, it continues to cool down a few more degrees. This creates a "safety buffer" of cooler, denser liquid, ensuring no stray vapor bubbles make it to the next stage where they can wreck performance.
That extra bit of cooling is exactly what we’re measuring.
The Final Steps Inside Your Home
Now, we have a high-pressure, subcooled liquid. It travels through the liquid line into your indoor unit, where it hits the expansion valve (sometimes called a metering device). This valve is just a tiny, precise nozzle.
When the liquid refrigerant is forced through this nozzle, its pressure drops dramatically and instantly. This rapid expansion makes the refrigerant intensely cold as it sprays into the last stop on its tour: the evaporator coil.
Evaporator Coil: This is tucked inside your home's air handler, and it's where the magic really happens. As your indoor air is blown across the coil, the frigid refrigerant inside absorbs the heat right out of it.
Boiling and Vaporizing: All that heat it soaks up causes the refrigerant to boil and turn back into a cool, low-pressure gas.
Return to Compressor: From there, the gas flows back to the compressor, carrying the heat it just pulled out of your house, and the entire cycle starts all over again.
This constant loop is what keeps your home cool. Understanding what subcooling is in HVAC is all about seeing its role in perfecting the refrigerant's liquid state right before it gets to work making your air comfortable.
How Proper Subcooling Boosts HVAC Efficiency
It's one thing to understand the textbook definition of subcooling, but it's another to see what it actually does for an HVAC system. Getting the subcooling right isn't just some technical box to check; it’s one of the most direct ways to improve a system's efficiency, extend its lifespan, and lower your energy bills.
When your system has the perfect amount of subcooling, it’s primed to deliver maximum cooling power. Think of it like a perfectly hydrated athlete ready for a race. That system doesn't have to work as hard to cool your home. It hits the set temperature on your thermostat faster, which means shorter run times and less electricity used.
Maximizing Cooling Capacity and Protecting the Compressor
The whole point of subcooling is to make sure a solid column of liquid refrigerant—with no vapor bubbles—arrives at the indoor expansion valve. This is absolutely critical for peak performance. If even a small amount of vapor, known as flash gas, gets into that valve, it’s a big problem.
That flash gas takes up precious space that should be filled with dense liquid refrigerant. The result? The system’s cooling capacity drops like a rock. The unit is forced to run longer and harder to do the same job, which strains components and just flat-out wastes energy.
A correctly charged system with optimal subcooling ensures the expansion valve operates exactly as designed, providing a consistent and powerful cooling effect. This not only enhances comfort but also acts as a critical protective measure for the system's most vital and expensive component—the compressor.
By preventing flash gas, proper subcooling also guarantees the compressor gets only cool vapor back from the evaporator coil. If liquid refrigerant were to flood back into the compressor, it could cause catastrophic damage. Smooth, predictable operation like this dramatically reduces wear and tear, helping your entire HVAC unit last longer.
The Financial Impact of Precise Subcooling
The efficiency gains from correct subcooling aren't just theoretical numbers on a spec sheet. They translate directly into real money saved. When an air conditioner is running at its best, it simply uses less energy to keep you comfortable.
Field data from countless HVAC service calls confirms it: systems with the correct refrigerant charge and subcooling can cut energy use by 5% to 15%. Over the course of a long, hot summer, that adds up to a noticeable drop in your utility bills. You can dig deeper into how different charging methods affect performance by reading the full explanation on ACServiceTech.com.
In the end, hitting that manufacturer-specified subcooling target is one of the most effective things you can do to keep your HVAC system running efficiently, reliably, and affordably for years. It’s far more than just a measurement; it's a vital sign of your system's overall health.
Measuring Subcooling Like a Pro
Alright, we’ve covered the "why," so let's get into the "how." Measuring subcooling is a precise task, but it’s far from complicated. Think of it like taking a system's blood pressure—it's a routine check for technicians that gives them a direct window into the unit's health and, most importantly, its refrigerant charge.
The whole process boils down to a simple but powerful formula. By comparing two key temperatures, a technician can pinpoint the exact subcooling value and figure out precisely what’s going on inside the system.
The Essential Tools for the Job
Before you can get an accurate reading, you need the right gear. Each tool here has a specific job to do, and getting a reliable measurement depends on using them correctly.
To measure subcooling accurately, you'll need a few key items. Here’s a quick breakdown of the essential toolkit.
Subcooling Measurement Tools and Their Purpose
Tool | Primary Function | Pro Tip |
|---|---|---|
Gauge Manifold | Connects to the system's service ports to measure the refrigerant pressure on the high-pressure (liquid) side. | Always purge your hoses to prevent air and moisture from contaminating the system. |
Temperature Clamp/Probe | Clamps securely onto the liquid refrigerant line to get a precise, real-time temperature reading of the pipe's surface. | Ensure the clamp makes solid contact with a clean section of the pipe for an accurate reading. |
Pressure-Temperature (P/T) Chart | Converts the pressure reading from your gauges into the corresponding saturation (boiling) temperature for a specific refrigerant. | Most digital manifolds have P/T charts built-in, which saves time and reduces the chance of errors. |
These tools work together to give you the two numbers you need for the final calculation.
At its core, the formula is refreshingly simple:
Saturation Temperature – Actual Line Temperature = Subcooling
This one calculation tells the whole story. It confirms how many degrees the refrigerant has cooled below its boiling point, ensuring there’s a solid column of liquid ready to feed the expansion valve and get to work.
A Step-by-Step Practical Example
Let's walk through a real-world scenario with a common refrigerant, R-410A, to see how it works.
Connect the Gauges: First, a technician connects the high-pressure (red) hose from the manifold gauges to the liquid line service port on the outdoor condenser unit.
Measure the Pressure: After letting the system run for at least 15 minutes to stabilize, they check the high-side pressure. For our example, let's say the gauge reads 318 PSIG.
Find the Saturation Temperature: Using a P/T chart for R-410A, the technician looks up 318 PSIG. This pressure corresponds to a saturation temperature of 100°F. This is the point where R-410A would boil if any more heat were added.
Measure the Actual Temperature: Next, they place the temperature clamp on the liquid line, right near the service port. The digital display shows the pipe's actual surface temperature is 90°F.
Calculate Subcooling: Now for the easy part. Just plug the numbers into the formula: 100°F (Saturation Temp) - 90°F (Actual Temp) = 10°F of subcooling.
This result, 10°F, tells the technician the system is properly charged, assuming the manufacturer's target is around that number.
This simple visual helps tie all these steps together into the broader optimization process.
As you can see, measuring is just the first step. Once you know the subcooling value, you can confidently make any necessary adjustments to the refrigerant charge to hit the manufacturer's target and get the system running at peak performance.
What Your Subcooling Numbers Are Telling You
A subcooling reading isn't just another number on a gauge; it's one of the most direct health reports you can get for an air conditioning system. When a technician calculates this value, they get an instant snapshot of the unit's condition, allowing them to diagnose problems with remarkable accuracy.
But what does a high, low, or ideal reading actually mean?
Every piece of HVAC equipment has a "target" subcooling value set by the manufacturer, which you can usually find right on the unit's data plate. This target is the sweet spot for peak performance and efficiency. Nailing that number means the refrigerant charge is just right and the whole system is running exactly as it should be.
While the ideal range can vary by model and conditions, many systems operate best with 8°F to 12°F of subcooling. Think of this as the "green zone" on your system's health gauge.
Interpreting a Low Subcooling Reading
When your subcooling reading comes in well below the manufacturer's target, it’s a major red flag. In almost every case, low subcooling points to an undercharged system. And an undercharged system almost always means there's a refrigerant leak somewhere.
If the refrigerant level is too low, there simply isn't enough liquid refrigerant in the condenser to adequately cool down after it has condensed from a gas. This creates a cascade of problems:
Poor Cooling: The system struggles to absorb heat from inside your home.
Flash Gas: Bubbles of refrigerant vapor can form before the liquid reaches the metering device, which kills efficiency.
Compressor Strain: The compressor has to work overtime to try and compensate, leading to excessive wear and a much shorter lifespan.
A low subcooling number tells a technician they need to find and fix that leak before even thinking about adding more refrigerant.
A low subcooling value is like a car engine running low on oil. It might still turn over for a little while, but it's under incredible strain, and catastrophic failure is just around the corner if you don't address it immediately.
Decoding a High Subcooling Reading
On the other side of the coin, you have a high subcooling reading. This almost always means the system is overcharged with refrigerant. This often happens when a less experienced technician adds too much "Freon" during a service call, accidentally creating a new and equally dangerous problem.
With too much refrigerant in the system, liquid starts to back up into the condenser coil. This "liquid stacking" essentially floods the coil, leaving less surface area for the heat exchange process to happen. As a result, system pressures can climb to dangerous levels.
An overcharged system can cause severe compressor damage, tank your efficiency, and send your energy bills through the roof. It's a serious condition that requires a certified technician to safely recover the excess refrigerant and restore the proper charge.
Putting Your Subcooling Numbers to Work
Alright, so you’ve got your subcooling reading. What now? Think of it like a vital sign for the HVAC system. A good reading means a clean bill of health, but a bad one tells you exactly where to start looking for the problem.
Let's walk through how a pro turns those numbers into real-world fixes. This isn't just about getting the cold air blowing again; it’s about protecting the heart of the system—the compressor—and keeping energy bills from creeping up. Getting it right prevents a small hiccup from turning into a catastrophic failure.
What to Do When Subcooling Is Low
A low subcooling reading is almost always a dead giveaway for one thing: the system is low on refrigerant. And refrigerant doesn't just evaporate—if it's low, there's a leak somewhere.
Just dumping more refrigerant in is like putting air in a tire with a nail in it. It's a band-aid, not a fix. A real technician knows the right way to handle it.
Hunt Down the Leak: First things first, you have to find the source. This means breaking out the tools of the trade—electronic "sniffers," UV dye, or even a simple soap bubble solution. Leaks often hide in plain sight at flare fittings, on corroded coils, or at those pesky little Schrader valves.
Repair and Recharge Properly: Once the leak is patched, the job's not done. The system has to be completely evacuated with a vacuum pump to pull out all the air and moisture that got in. Only then can the technician weigh in a precise charge, watching the subcooling number climb until it hits that sweet spot designated by the manufacturer.
An undercharged system is a compressor killer. It has to work overtime to produce less cooling, which is a recipe for premature failure of the most expensive part of the unit.
Fixing the Problem of High Subcooling
On the flip side, a high subcooling reading screams "overcharged!" Too much refrigerant has been added to the system. This creates dangerously high pressure in the condenser, putting an immense strain on the compressor. It's a serious issue.
The fix sounds simple, but it's a job that absolutely requires a certified pro.
The only way to correct an overcharge is to safely recover the excess refrigerant. This isn't a DIY task. It legally requires an EPA-certified technician to use a special recovery machine and a designated tank. They'll carefully pull out small amounts of refrigerant at a time, letting the system pressures stabilize and re-checking the subcooling until it drops back into the target range.
When It's Not the Refrigerant Charge
While the refrigerant level is the usual suspect 9 times out of 10, other system gremlins can mess with your subcooling. A restriction in the liquid line is a classic example.
If you have a clogged filter drier or a thermal expansion valve (TXV) that’s stuck, liquid refrigerant can get backed up. This will artificially inflate your subcooling reading, even if the charge is perfect. A seasoned technician knows not to jump to conclusions. They'll always check the superheat reading as well to get the full story before diagnosing these trickier mechanical failures.
Common Questions We Get About Subcooling
Even after you get the hang of the theory, a few practical questions always seem to pop up. Let's tackle some of the most common ones I hear from homeowners and new technicians to connect the dots between the textbook and what you actually see in the field.
What's the Difference Between Subcooling and Superheat?
Think of subcooling and superheat as two sides of the same coin. They're both critical measurements, but they tell you about what's happening at opposite ends of the air conditioning cycle. You really need both to get the full story on system health.
Subcooling is all about the liquid line. It tells you how much heat we've pulled out of the refrigerant after it has already condensed into a liquid in the outdoor unit. The goal here is simple: guarantee that 100% solid liquid gets to the metering device inside.
Superheat is the opposite, focusing on the suction line. It measures how much heat the refrigerant has absorbed after it has already boiled into a vapor in the indoor coil. Its job is to ensure 100% pure vapor makes it back to protect the compressor.
So, when you hear "subcooling," think high-pressure liquid leaving the condenser. When you hear "superheat," think low-pressure vapor returning to the compressor.
Can I Check My Own HVAC Subcooling?
I get this question a lot, and while it's fantastic that you're learning how your system works, this is one of those jobs you really need to leave to a pro. Taking an accurate subcooling measurement requires specialized tools like a good set of manifold gauges and a reliable temperature clamp—equipment most homeowners just don't have lying around.
But there's a much bigger reason: safety and legality. Handling refrigerants is tightly regulated, and you must have an EPA Section 608 certification to work with them. Trying to add or remove refrigerant without the right training and credentials isn't just illegal; it's genuinely dangerous and can lead to catastrophic equipment failure or serious injury. Always call a qualified HVAC technician for these checks.
Why Does the Target Subcooling Value Change?
You’ll notice that the ideal subcooling number isn't one-size-fits-all. That's because manufacturers engineer the target value for each specific piece of equipment.
The perfect subcooling reading depends on a bunch of factors, like the type of refrigerant being used (R-410A acts differently than older R-22), the unit's SEER rating, and the kind of metering device it has. A high-efficiency 20 SEER system will likely have a different target than a standard 14 SEER builder's model to hit its performance goals.
This is why you always check the manufacturer's data plate on the outdoor unit. It will tell you the exact subcooling target you should be aiming for. Guessing is a surefire way to hurt the system's efficiency or even cause damage.
Keep Reading
Related Articles

What is a VFD in HVAC? A Practical Explainer
What is a VFD in HVAC? A Practical Explainer
What is a VFD in HVAC? Learn how Variable Frequency Drives work, their key benefits for energy savings, and their most common applications in modern buildings.
Aug 7, 2025
Aug 7, 2025

Your Guide to Refrigerant Pressure Temp Charts
Your Guide to Refrigerant Pressure Temp Charts
Master the refrigerant pressure temp chart. This guide explains how to read and use PT charts for system diagnosis, charging, and ensuring HVAC efficiency.
Aug 8, 2025
Aug 8, 2025

How to Read HVAC Wiring Diagrams: A Complete Guide
How to Read HVAC Wiring Diagrams: A Complete Guide
Learn how to read HVAC wiring diagrams with our easy-to-follow guide. Master wiring diagrams quickly and confidently.
Aug 8, 2025
Aug 8, 2025
What is a VFD in HVAC? A Practical Explainer
What is a VFD in HVAC? Learn how Variable Frequency Drives work, their key benefits for energy savings, and their most common applications in modern buildings.
Aug 7, 2025
Aug 7, 2025
Your Guide to Refrigerant Pressure Temp Charts
Master the refrigerant pressure temp chart. This guide explains how to read and use PT charts for system diagnosis, charging, and ensuring HVAC efficiency.
Aug 8, 2025
Aug 8, 2025
How to Read HVAC Wiring Diagrams: A Complete Guide
Learn how to read HVAC wiring diagrams with our easy-to-follow guide. Master wiring diagrams quickly and confidently.
Aug 8, 2025
Aug 8, 2025

How to Read a Refractometer for Perfect Results
Learn how to read a refractometer with our expert guide. Get clear, actionable steps for accurate readings and master this essential skill today.
Aug 10, 2025
Aug 10, 2025

Condenser Fan Motors


Pressure Transducers


Sensors

EBUS Horizontal Outside Air Temp/RH Sensor
Aftermarket Part for AAON ASM01836

EBUS Vertical Outside Air Temp/RH Sensor
Aftermarket Part for AAON ASM01838

Duct Mount Humidity/Temp Sensor
Aftermarket Part for Addison 0843P-0586
Duct Euro Humidity/Temperature Sensor
Aftermarket Part for Addison

Outdoor Humidity/Temperature Sensor
Aftermarket Part for Addison 0843P-0587

Room Humidity/Temperature Sensor
Aftermarket Part for Addison

Outdoor Euro Temperature Sensor
Aftermarket Part for Addison

Suction Line Temperature Sensor
Aftermarket Part for Addison 0843P-0838
Variable Frequency Drives

Microchannel Coils

Circuit Breakers


Refrigeration Parts
Soon
0-250psi
Aftermarket Part for Addison 0515P-0783
0-250psi
Aftermarket Part for Addison 0515P-0783
0-250psi
Aftermarket Part for Addison 0515P-0783
0-250psi
Aftermarket Part for Addison 0515P-0783
0-250psi
Aftermarket Part for Addison 0515P-0783
0-250psi
Aftermarket Part for Addison 0515P-0783
0-250psi
Aftermarket Part for Addison 0515P-0783
0-250psi
Aftermarket Part for Addison 0515P-0783
Condenser Fan Motors
Pressure Transducers
Sensors
EBUS Horizontal Outside Air Temp/RH Sensor
Aftermarket Part for AAON ASM01836
EBUS Vertical Outside Air Temp/RH Sensor
Aftermarket Part for AAON ASM01838
Duct Mount Humidity/Temp Sensor
Aftermarket Part for Addison 0843P-0586
Duct Euro Humidity/Temperature Sensor
Aftermarket Part for Addison
Outdoor Humidity/Temperature Sensor
Aftermarket Part for Addison 0843P-0587
Room Humidity/Temperature Sensor
Aftermarket Part for Addison
Outdoor Euro Temperature Sensor
Aftermarket Part for Addison
Suction Line Temperature Sensor
Aftermarket Part for Addison 0843P-0838
Variable Frequency Drives
Microchannel Coils
Circuit Breakers
Refrigeration Parts
Soon
0-250psi
Aftermarket Part for Addison 0515P-0783
0-250psi
Aftermarket Part for Addison 0515P-0783
0-250psi
Aftermarket Part for Addison 0515P-0783
0-250psi
Aftermarket Part for Addison 0515P-0783
0-250psi
Aftermarket Part for Addison 0515P-0783
0-250psi
Aftermarket Part for Addison 0515P-0783
0-250psi
Aftermarket Part for Addison 0515P-0783
0-250psi
Aftermarket Part for Addison 0515P-0783