Back
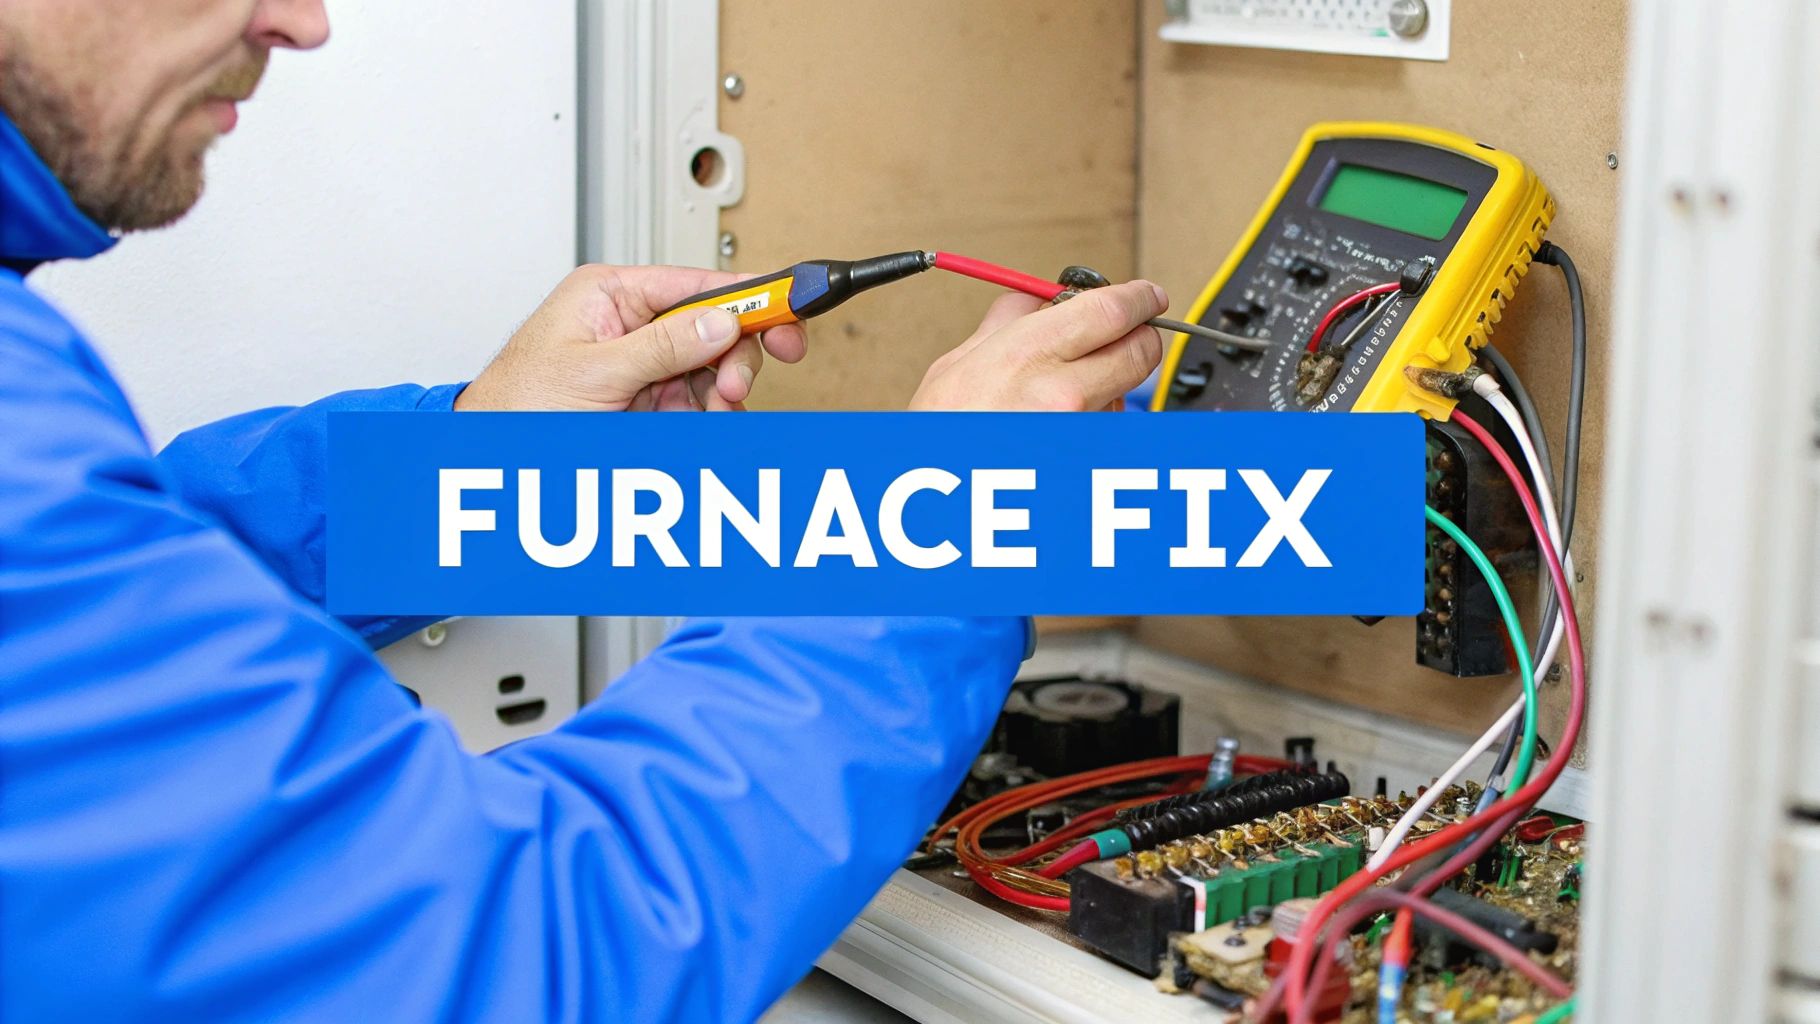
DIY Furnace Circuit Board Replacement Guide
Is a furnace circuit board replacement your next DIY project? Our guide walks you through diagnosing failure, finding the right part, and the swap-out process.
Aug 28, 2025
Aug 28, 2025
Table of Contents
Table of Contents
NOTE: This content is for informational purposes only. EPS Controls assumes no liability for what you do with this information—consult a qualified HVAC technician before making changes.
NOTE: This content is for informational purposes only. EPS Controls assumes no liability for what you do with this information—consult a qualified HVAC technician before making changes.
Don't just assume you need a furnace circuit board replacement at the first sign of trouble. That can be a costly mistake. More often than not, problems like a clicking furnace or a blower that won’t quit have much simpler—and cheaper—fixes. Proper diagnosis is everything, so let's walk through how to figure out what's really going on before you spend a dime.
Diagnosing a Failing Furnace Circuit Board
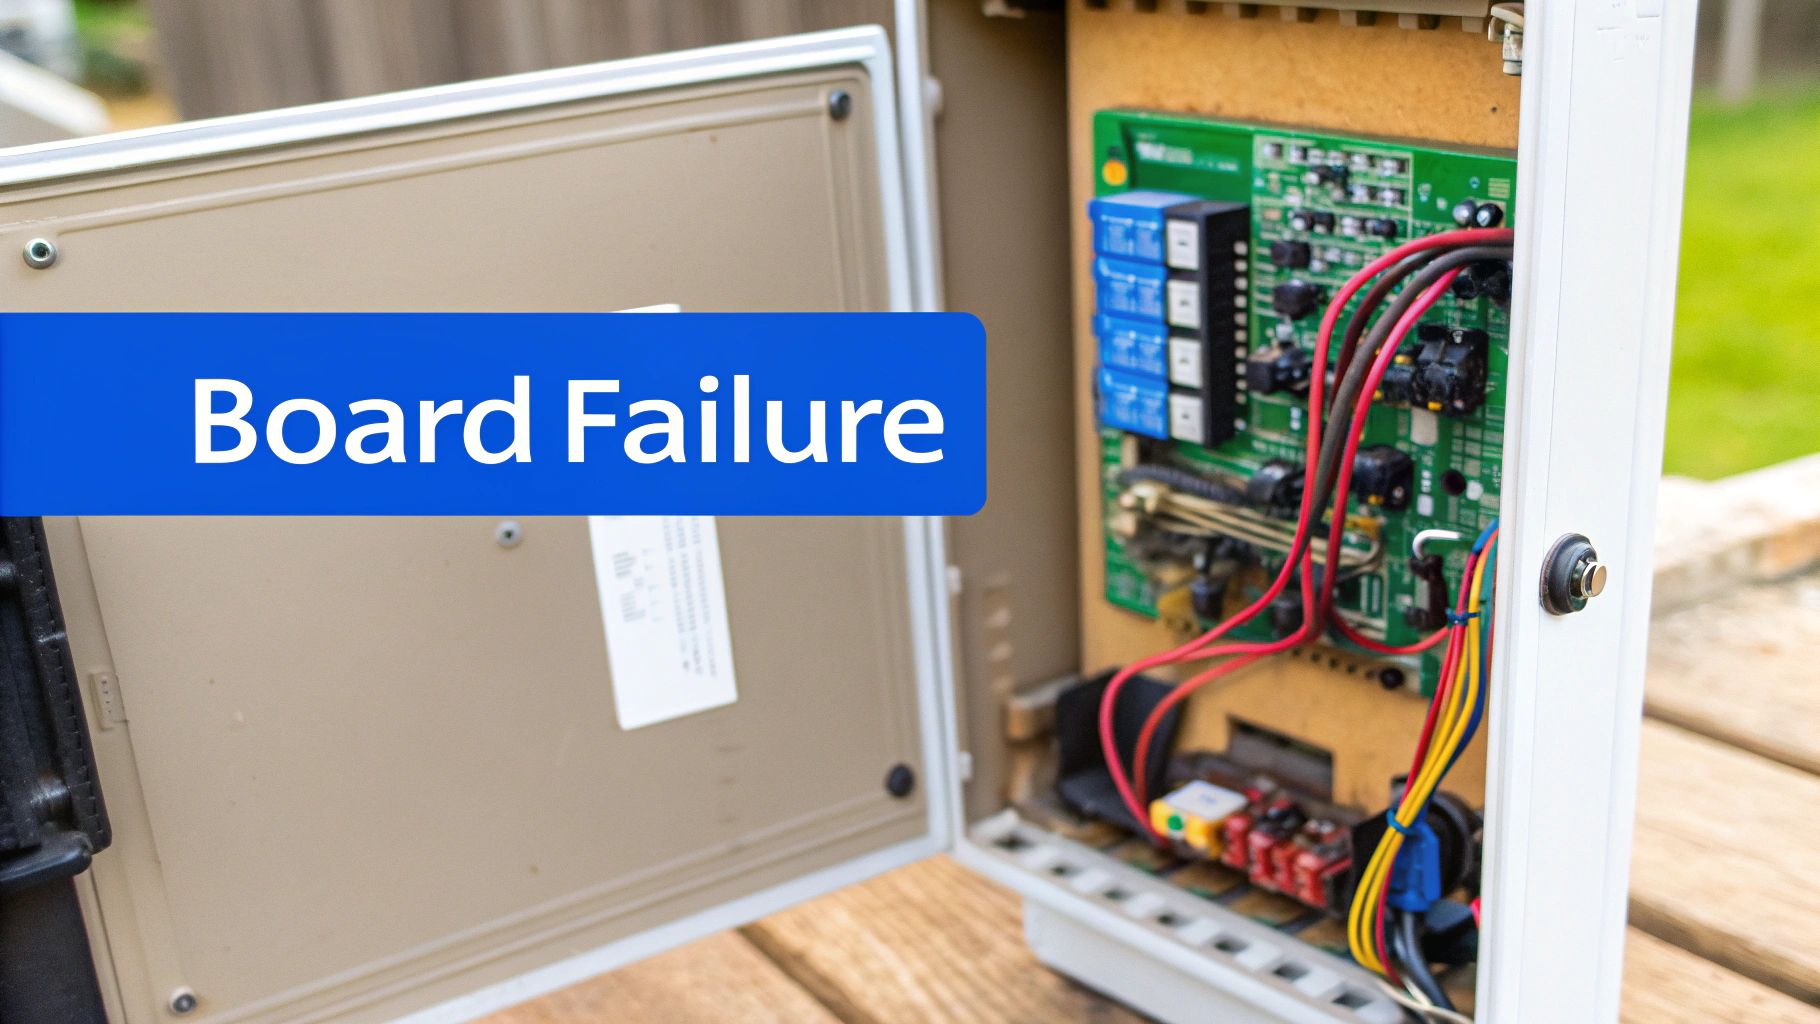
Before you point the finger at the circuit board—the brains of your entire heating system—you have to rule out the usual suspects. A furnace that's acting up doesn't automatically mean its most expensive part has failed. I’ve seen countless homeowners get ready to replace a perfectly good board when the real culprit was a dirty air filter or a bad thermostat.
The goal here is to be certain. A failing circuit board has a few classic calling cards that set it apart from simple mechanical or airflow issues. Learning to spot these is your first real step toward a fix.
Telltale Signs of a Bad Board
So, what are you actually looking for? A bad circuit board usually makes the furnace behave erratically. For example, you might hear a distinct click like it's trying to start, but the burners never actually kick on. This "click, no flame" issue is a classic symptom of a failed relay on the board.
Another dead giveaway is a blower motor that runs and runs, long after the thermostat is satisfied. This happens when the board fails to send the "shut off" signal. Sometimes, the evidence is right there to see—look for visible burn marks or scorches on the board itself.
Here are a few specific scenarios that scream "board issue":
No Power at the Thermostat: If your thermostat display is blank but you know the batteries are fresh, the board probably isn't sending the low-voltage power it needs to run.
Nonsensical Error Codes: Most modern furnaces have an LED that flashes diagnostic codes. If the codes are inconsistent or point to multiple, unrelated problems at once, the board's logic is likely fried.
That Burnt Electronics Smell: A sharp, acrid smell like burning plastic coming from your furnace unit is a huge red flag. It almost always means a component on the circuit board has shorted out.
Key Takeaway: Think of the circuit board as the conductor of an orchestra. It tells every part of your furnace what to do and when. When it fails, the whole heating sequence falls apart, resulting in predictable problems like ignition failure, a runaway blower, or confusing error codes.
Circuit Board Failure vs Other Common Furnace Issues
It’s easy to misdiagnose a furnace problem. This quick reference table can help you distinguish between a bad control board and other common issues.
Symptom | Likely Cause (Circuit Board) | Other Possible Causes |
|---|---|---|
Furnace won't turn on | The board isn't sending power to any components. | Tripped circuit breaker, faulty thermostat, bad transformer. |
Blower runs constantly | The board's fan relay is stuck in the "on" position. | Thermostat fan switch is set to "On," faulty fan limit switch. |
Burners won't light | The board isn't sending a signal to the ignitor or gas valve. | Clogged flame sensor, faulty ignitor, bad gas valve, blocked flue. |
Burners light, then go out | The board isn't detecting the flame and shuts off the gas as a safety measure. | Dirty flame sensor (most common!), cracked heat exchanger. |
Remember, this table is just a guide. Always start with the simplest potential causes—like the thermostat settings or a dirty filter—before assuming the worst.
It’s no surprise that HVAC system repairs are on the rise. The global market for HVAC controls, including these critical circuit boards, was valued at USD 15.18 billion in 2021 and is expected to climb to USD 27.34 billion by 2028. As furnaces get older, this kind of replacement becomes more common. You can read more about this HVAC market trend on GlobeNewswire.
Finding the Right Replacement Board
Alright, you've pinpointed the problem: a fried circuit board. Now comes the real trick—getting the exact right part for your furnace circuit board replacement. Grabbing the wrong one won't just waste your time and money; it can cause your furnace to act up, lead to more damage, or create a serious safety issue. The secret is all in the part number.
First things first, look at the old board. Somewhere on there, either stamped directly onto the green plastic or on a sticker, will be a string of numbers and letters. That's the manufacturer's part number, and it's what you need. It might look something like "CNT07941" on a Trane system or "1172809" if you're working on a Goodman.
A Quick Tip from the Field: Boards are often covered in numbers. You'll see serial numbers, PCB layout codes, all sorts of things. The one you’re looking for is usually the most prominent one, often on a white sticker and sometimes labeled "P/N" or "Part No."
Where to Look for the Part Number
Don't just write down the first number you see. Manufacturers can be tricky, so you need to know where to hunt. For example, a Honeywell board might have a main part number like "S9200U1000," but also a separate PCB number that won't help you order a replacement.
Scan the Edges: Part numbers are often printed right along the outer edges of the board.
Find the Sticker: Companies like White-Rodgers or ICM usually put a sticker with the model and part number right on a large chip or another flat, open area.
When in Doubt, Check the Manual: If a component has burned and the number is impossible to read, your furnace's service manual is your backup. It should list the original part number you need.
OEM vs. Aftermarket: What’s the Best Choice?
Once you have that part number, you have a decision to make. Do you go with an Original Equipment Manufacturer (OEM) board, or do you pick up a universal aftermarket version?
An OEM part is the genuine article, made by (or for) the company that built your furnace. It’s a guaranteed match, a true plug-and-play solution. This is always the safest bet, but it's usually the most expensive one, too.
Aftermarket boards, on the other hand, are made by other companies to work with a whole range of furnace models. They’re a lot easier on the wallet and you can often find them at suppliers like EPS Controls. The catch? You might need to do a little extra work, like setting some tiny DIP switches or moving a jumper wire to get it configured perfectly for your furnace.
Board Type | The Good | The Bad |
|---|---|---|
OEM | Perfect compatibility, simple installation, keeps your warranty intact. | Costs more, can be tough to find for older furnaces. |
Aftermarket | Cheaper, easy to find, sometimes includes newer, updated features. | May need configuration, quality can vary by brand. |
Honestly, going with a quality aftermarket board is a perfectly good way to save some cash, especially if your furnace has a few years on it and OEM parts are getting scarce. The most important thing is to make sure the aftermarket board's description specifically says it replaces your original part number. Always, always double-check that cross-reference before you hit "buy"—it'll save you a world of headaches.
Essential Tools and Safety Precautions
Before you even think about touching a wire or loosening a screw, let's get one thing straight: safety is non-negotiable. When you're working on a furnace, this isn't just a friendly reminder—it's the golden rule. A simple mistake can damage your brand-new circuit board or, far worse, cause serious injury.
Your first move is always the same: kill the power.
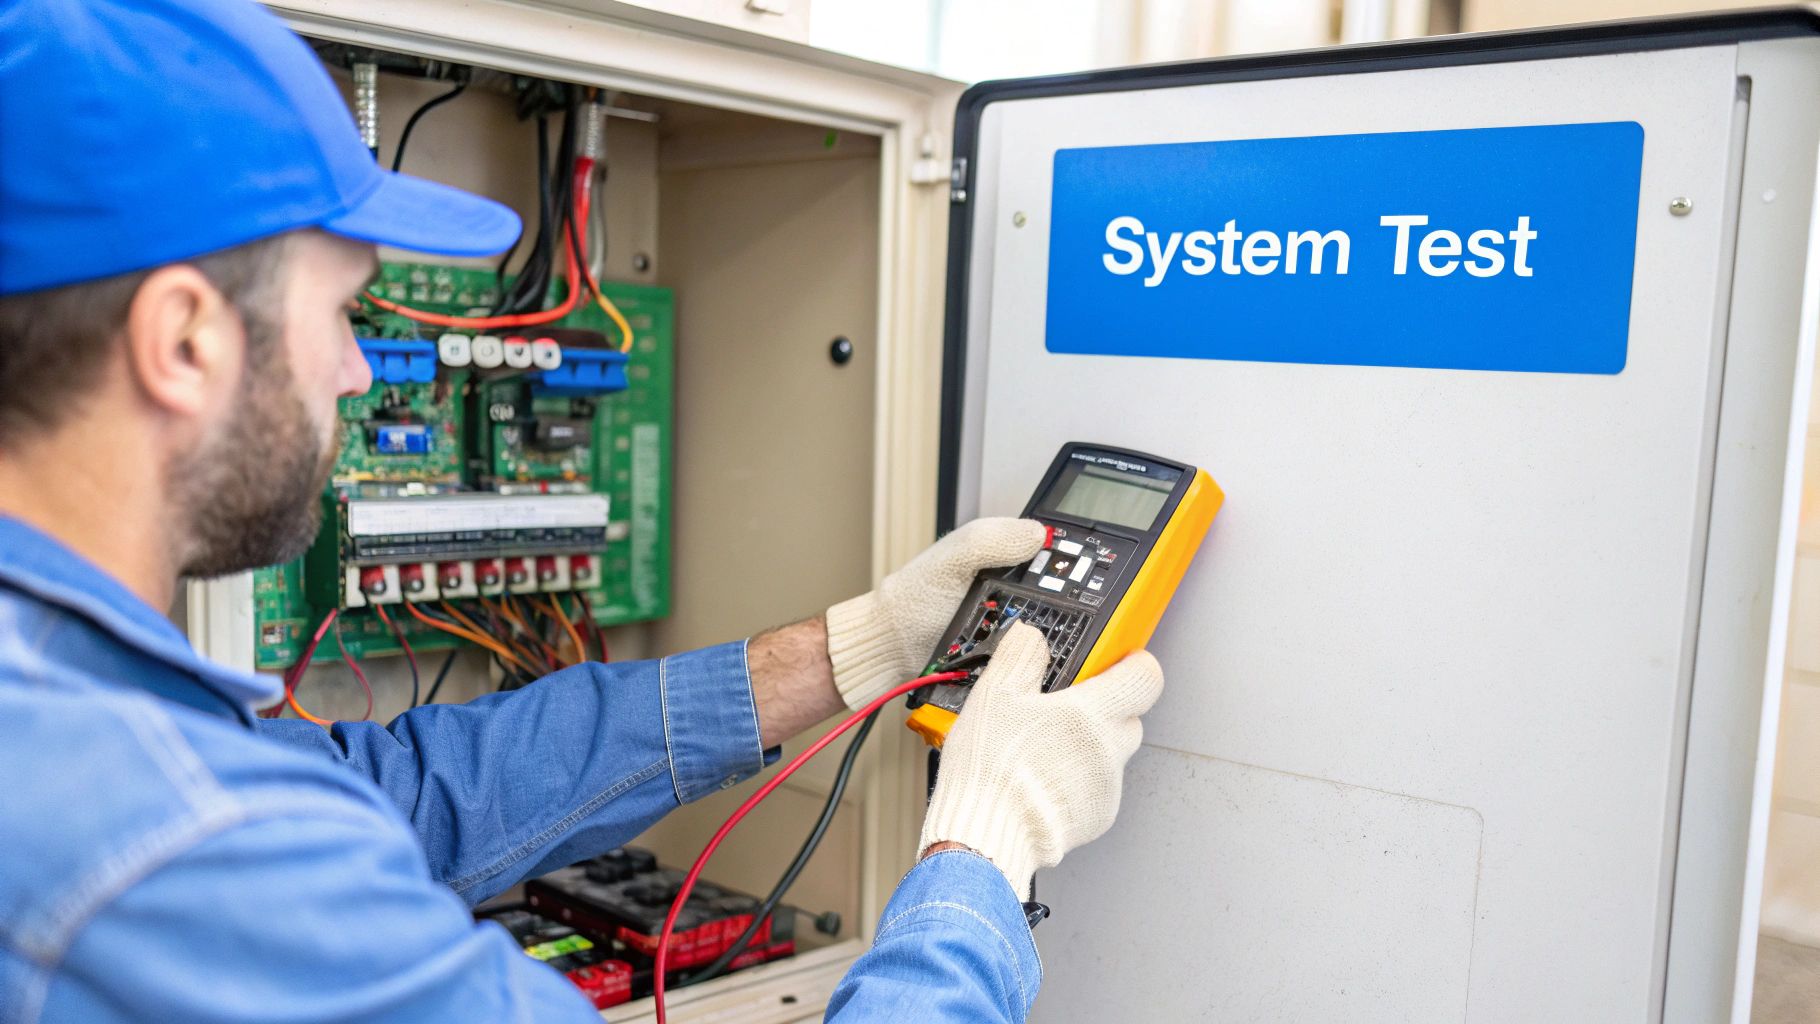
Head to your home's main electrical panel and flip the breaker that powers your furnace. Don't just assume it's off. Go back to the thermostat and try to kick the heat on. If nothing happens, you're on the right track. For absolute certainty, I always recommend using a multimeter to test the furnace terminals and confirm there is zero voltage. Trust me, it's a step worth taking.
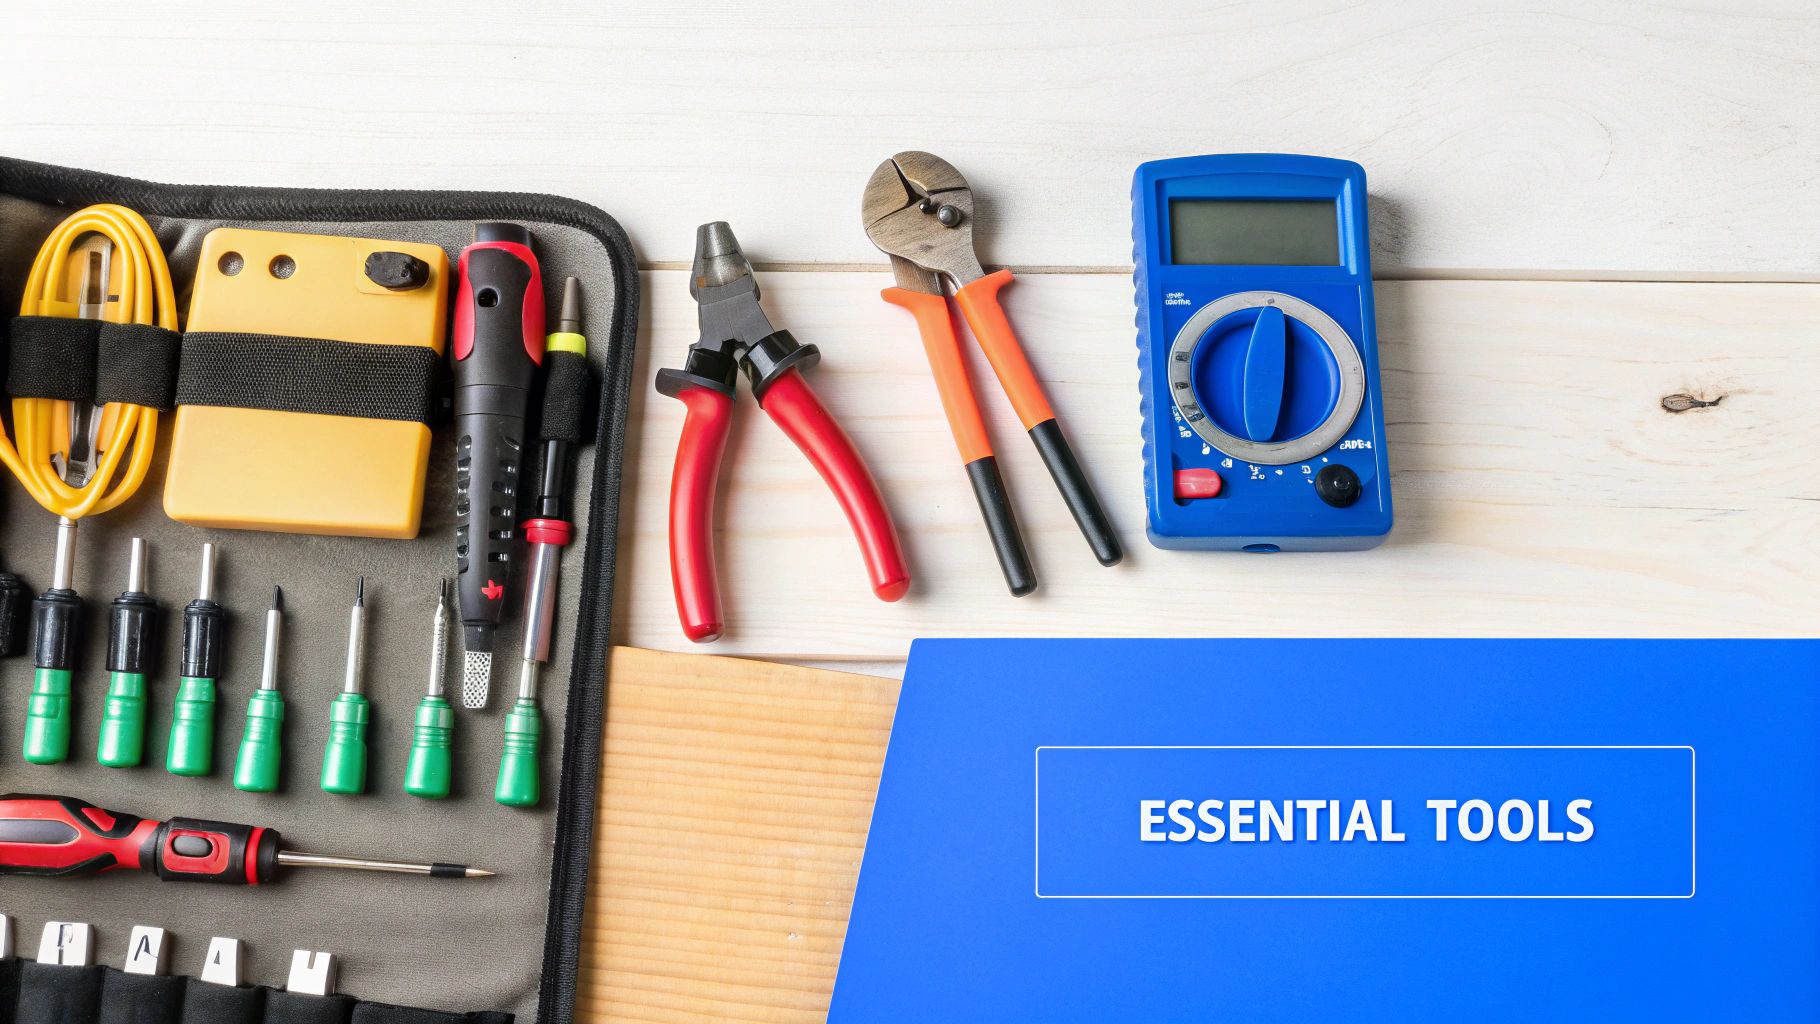
Assembling Your Toolkit
With the power confirmed off, it's time to gather your gear. You don't need a truck full of professional tools, but having the right items on hand will make this furnace circuit board replacement a hundred times easier. Nothing's more frustrating than having to stop mid-job to hunt for a specific tool.
Here's what I recommend having within arm's reach:
Your Smartphone: Seriously, this is your most important tool. Before you unplug a single wire, take a bunch of clear, well-lit photos of the old board from every angle. Zoom in on the wire connections. This visual record is priceless.
Nut Driver Set: A magnetic 1/4-inch or 5/16-inch nut driver is your best friend here. It's perfect for the hex-head screws holding the furnace panel and the board itself. The magnetic tip is a game-changer—no more dropped screws vanishing into the abyss.
Needle-Nose Pliers: You'll need these to gently grip and disconnect the spade connectors. Wiggling them off is much safer than yanking on the wires and potentially breaking something.
Wire Strippers/Cutters: You might find a frayed wire that needs a clean trim or a new end stripped for a better connection. It’s always good to have these handy.
Multimeter: This is a must-have. You'll use it to verify the power is off before you start and for troubleshooting later if the furnace doesn't fire up right away.
Pro Tip: I can't stress the photo step enough. I've seen even seasoned pros get tripped up by a complicated wiring setup. Your photos create a perfect, custom-made wiring diagram that takes all the guesswork out of reconnecting everything to the new board.
Creating a Safe Workspace
Finally, take a minute to set up your work area. Grab a small cup or a magnetic tray to keep all your screws in one place. Good lighting is key, so bring in a work light or use a headlamp to see into the dark corners of the furnace cabinet.
A clean, organized space helps you think clearly and dramatically reduces the chance of making a simple—but potentially costly—mistake.
Your Guide to Swapping the Circuit Board
Alright, you've got the new circuit board in hand and you’re absolutely certain the power is off. Now for the main event: the furnace circuit board replacement itself. This is where the real work begins, but let me give you some advice I’ve learned over the years—don't rush this part. A slow, methodical approach is what separates a successful repair from a frustrating phone call to a pro.
The goal here is precision, not speed. You're about to disconnect a whole mess of wires, and knowing exactly where each one goes is the key to getting your heat back on without any drama.
This whole process really boils down to three main phases, as you can see here.
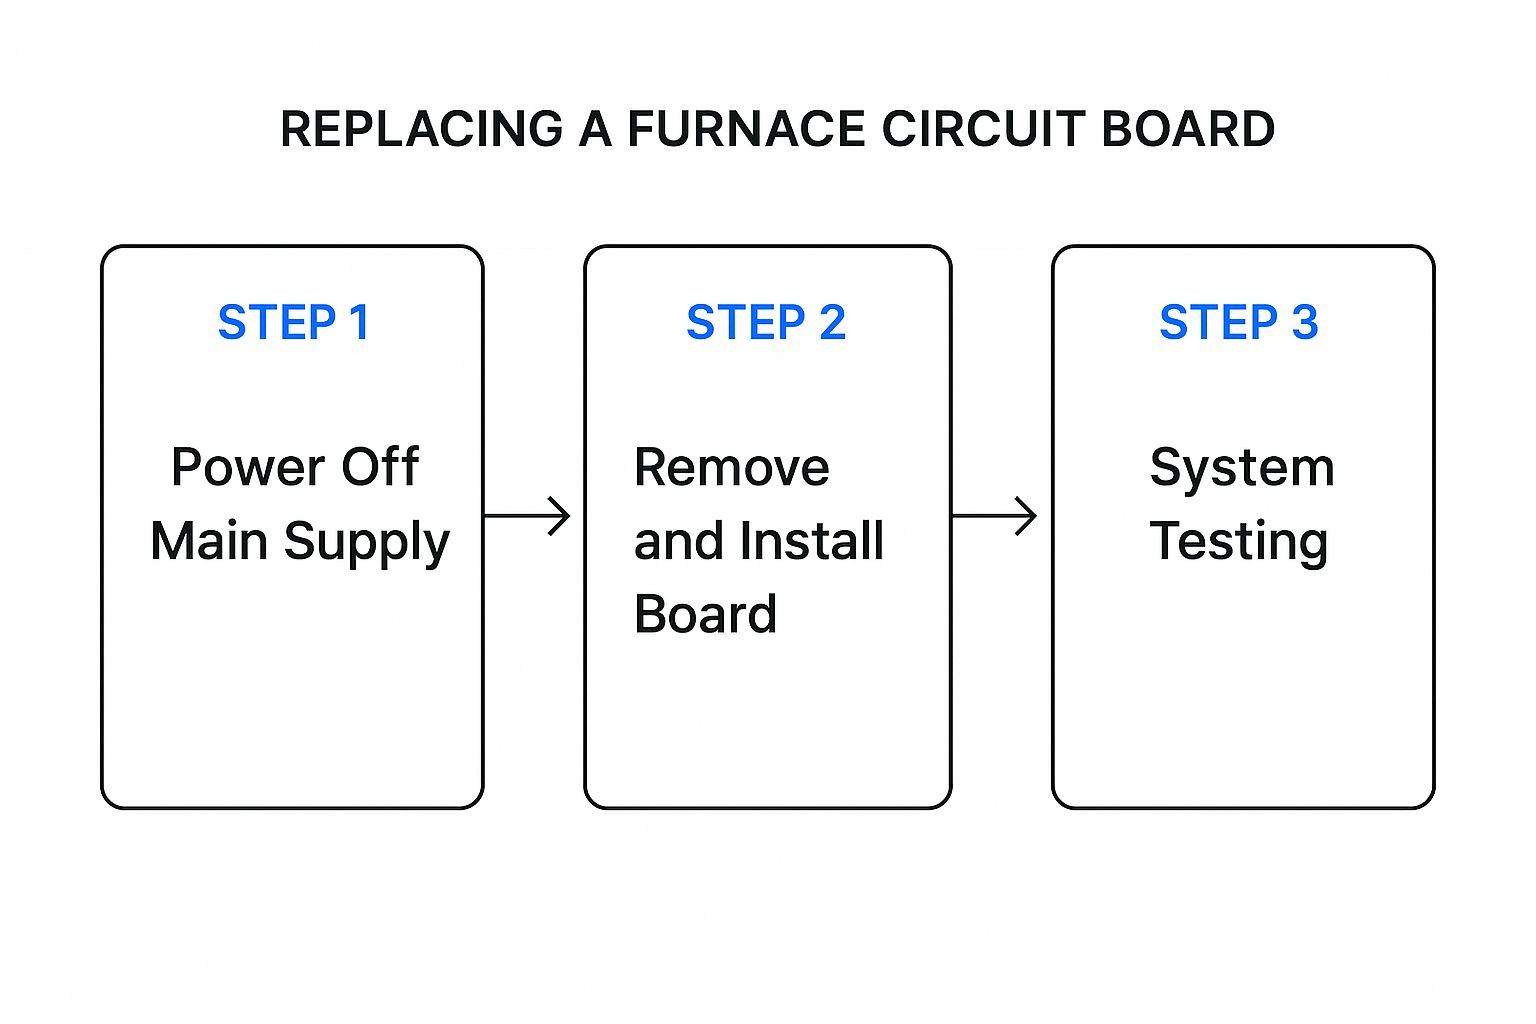
We'll follow this exact workflow: document and disconnect the old board, physically install the new one, and then double-check everything before flipping the switch.
Document and Disconnect the Old Board
Before you even think about pulling a wire, grab your phone. Those photos you took earlier are now your best friend.
Start by unplugging the big, blocky plastic connectors (we call them molex plugs). These usually contain a bundle of wires and are designed to only plug in one way, which makes them the easiest part of the job.
Next, you'll tackle the individual spade connectors. These are the single wires that push onto terminals, often labeled with codes like L1 (hot), N (neutral), G (fan), W (heat), and Y (cooling). Use your needle-nose pliers to gently wiggle them off the terminals. Whatever you do, don't just yank on the wire itself—that’s a great way to break something.
With the wires out of the way, you can now remove the board itself. It’s typically held in place by small plastic standoffs or a few mounting screws, usually at the corners. Carefully release those, and the old board should lift right out.
Crucial Tip: I’ve seen this one trip people up more times than I can count. Look closely at the old board for a row of tiny switches called DIP switches. These control specific settings for your furnace, like blower speeds. Your new board will come with these set to a default, which is almost never correct for your system. You must set the DIP switches on the new board to exactly match the old one. Snap a clear, close-up photo of the old switches before you do anything else.
Installing the New Furnace Circuit Board
Putting the new board in is basically the reverse of taking the old one out, but this is where your attention to detail really matters.
Gently set the new board onto its plastic mounting standoffs until it snaps securely into place. Don't force it. If it’s not sitting right, take a second to check its alignment.
Now, pull up those photos on your phone and start reconnecting everything. I like to plug in the big molex connectors first; they give you a nice, stable starting point. Then, move on to the individual spade connectors one by one. This is where those photos become a lifesaver, ensuring the wire for the gas valve actually ends up on the "GAS" terminal.
A loose connection is probably the #1 cause of problems after a board swap. Give each wire a gentle tug after you connect it to make sure it's on there good and tight. A bad contact can cause all sorts of weird issues, so taking an extra minute here is well worth it.
Final Checks Before Powering On
Once all the wires are reconnected, stop. Take a deep breath and do one last visual inspection.
Pull up your "before" photos and compare them to your work.
Are all the wires connected?
Are there any stray strands of copper hanging out that could cause a short?
Is the new board sitting flat and secure on its mounts?
This final once-over is your last chance to catch a simple mistake.
If everything looks good, go ahead and put the furnace access panel back on. Only after the panel is secure should you head back to the breaker box to restore power. The next step is to fire it up and see if your hard work paid off.
Should You DIY or Call a Professional?
When your furnace circuit board dies, the temptation to tackle the replacement yourself is strong. After all, how hard can it be? Buy the part, swap it out, and save a few hundred bucks on labor. But before you dive in, it’s worth taking a step back.
This isn't just about saving money. It's about weighing the cost against the very real risks that come with working on a major home appliance. A simple slip-up can quickly turn a straightforward repair into a far more complex and expensive disaster.
Breaking Down the Real Costs
Hiring a professional HVAC technician isn't just paying someone to plug in a board. You're paying for their expertise. A professional replacement will typically run you between $150 and $450, a price that covers the part, the skilled labor, and—most importantly—an accurate diagnosis. That initial diagnostic fee, usually around $80 to $100, is crucial because it confirms the board is actually the problem before you spend money on a new one. For a deeper look, check out this cost breakdown for furnace repairs on Angi.com.
On the other hand, if you go the DIY route, you might only spend $50 to $300 on the circuit board itself. The savings look great on paper, but that price tag assumes you already own the right tools and, more critically, have the confidence to work with high-voltage components safely.
A professional's fee isn't just for labor; it's an investment in peace of mind. You're paying for their experience, liability insurance, and the guarantee that the job is done right the first time, protecting both your furnace and your home.
The Hidden Risks of a DIY Job
The financial side is just one piece of the puzzle. A simple wiring mistake could fry your brand-new circuit board the second you flip the power back on, instantly wiping out any money you saved. Even worse, a bad installation can damage other expensive components like the blower motor or gas valve, or create a serious safety hazard in your home.
And then there's the warranty to consider. Most furnace manufacturers will void the warranty if parts are installed by anyone other than a licensed technician. That means if a different, more expensive part fails later on, you'll be stuck with the entire bill.
So, before you make a decision, have an honest conversation with yourself about your skills and comfort level.
Electrical Experience: Do you know how to read a wiring diagram? Are you truly comfortable handling electrical components where a mistake could be dangerous?
Furnace Complexity: Is your furnace a newer, high-efficiency model? These often have more intricate wiring and sensors that complicate the job.
Personal Risk Tolerance: What happens if you make a mistake? Are you prepared to be without heat in the middle of winter while you figure out what went wrong?
If you have even a flicker of doubt, calling a professional is almost always the smarter, safer bet.
Your Top Questions After a Circuit Board Swap
Even with a brand-new circuit board installed and the furnace humming along nicely, you probably have a few questions. That's a good thing. The more you know about your HVAC system, the better you can take care of it down the road. Let's tackle some of the most common things people wonder about after this repair.
How Long Should a Furnace Circuit Board Last?
A quality circuit board is surprisingly tough, but it won't last forever. In a perfect world, you can expect it to last anywhere from 10 to 15 years, often the entire lifespan of the furnace itself.
But real-world conditions can definitely shorten that timeline. Things like power surges during a thunderstorm, constant rattling from an off-balance blower fan, or even just high humidity can all stress the delicate electronics and lead to an early failure. This is one reason why regular furnace check-ups are so important—they catch the little problems before they can take out the expensive parts.
What’s with the Blinking Lights on the New Board?
That little blinking LED you see through the furnace cabinet door? That’s the board talking to you. It's a built-in diagnostic system, and its flashes are a specific code.
A slow, steady, or solid light is usually the "all clear" signal, meaning the system has power and is waiting for a command.
A fast, continuous flicker often means there's a call for heat and the furnace is in the process of firing up.
A specific pattern of blinks (like two quick flashes, a pause, then three more) is signaling a specific fault.
Don't panic and try to guess what the blinks mean. There's almost always a sticker on the inside of the furnace door that serves as a decoder ring, telling you exactly what each code signifies.
Expert Insight: Don't be surprised if the new board's blinking pattern is different from the old one. Manufacturers frequently update their diagnostic codes with newer board versions. Always trust the legend on your furnace panel—it’s the source of truth for your specific setup.
Can a Power Surge Really Fry My New Board?
You bet it can. A power surge is public enemy number one for furnace circuit boards. A sudden, powerful jolt of electricity can instantly destroy the sensitive microchips and circuits, putting you right back at square one with another dead furnace.
The good news is that protecting your new board is pretty straightforward. The best line of defense is a whole-home surge protector installed at your main electrical panel. If that's not an option, you can also get a dedicated surge protector just for the HVAC unit itself. It's a small investment to safeguard a critical—and expensive—component.
The push for smarter, more efficient heating and cooling is a big deal in the industry. The entire global HVAC market, which is built on components like these circuit boards, is projected to climb from USD 299.28 billion in 2025 to a massive USD 407.77 billion by 2030. This boom is fueled by new energy regulations that encourage homeowners to upgrade older, less efficient systems. You can dig into the numbers and read more about these HVAC system market projections on MarketsandMarkets.
Don't just assume you need a furnace circuit board replacement at the first sign of trouble. That can be a costly mistake. More often than not, problems like a clicking furnace or a blower that won’t quit have much simpler—and cheaper—fixes. Proper diagnosis is everything, so let's walk through how to figure out what's really going on before you spend a dime.
Diagnosing a Failing Furnace Circuit Board
Before you point the finger at the circuit board—the brains of your entire heating system—you have to rule out the usual suspects. A furnace that's acting up doesn't automatically mean its most expensive part has failed. I’ve seen countless homeowners get ready to replace a perfectly good board when the real culprit was a dirty air filter or a bad thermostat.
The goal here is to be certain. A failing circuit board has a few classic calling cards that set it apart from simple mechanical or airflow issues. Learning to spot these is your first real step toward a fix.
Telltale Signs of a Bad Board
So, what are you actually looking for? A bad circuit board usually makes the furnace behave erratically. For example, you might hear a distinct click like it's trying to start, but the burners never actually kick on. This "click, no flame" issue is a classic symptom of a failed relay on the board.
Another dead giveaway is a blower motor that runs and runs, long after the thermostat is satisfied. This happens when the board fails to send the "shut off" signal. Sometimes, the evidence is right there to see—look for visible burn marks or scorches on the board itself.
Here are a few specific scenarios that scream "board issue":
No Power at the Thermostat: If your thermostat display is blank but you know the batteries are fresh, the board probably isn't sending the low-voltage power it needs to run.
Nonsensical Error Codes: Most modern furnaces have an LED that flashes diagnostic codes. If the codes are inconsistent or point to multiple, unrelated problems at once, the board's logic is likely fried.
That Burnt Electronics Smell: A sharp, acrid smell like burning plastic coming from your furnace unit is a huge red flag. It almost always means a component on the circuit board has shorted out.
Key Takeaway: Think of the circuit board as the conductor of an orchestra. It tells every part of your furnace what to do and when. When it fails, the whole heating sequence falls apart, resulting in predictable problems like ignition failure, a runaway blower, or confusing error codes.
Circuit Board Failure vs Other Common Furnace Issues
It’s easy to misdiagnose a furnace problem. This quick reference table can help you distinguish between a bad control board and other common issues.
Symptom | Likely Cause (Circuit Board) | Other Possible Causes |
|---|---|---|
Furnace won't turn on | The board isn't sending power to any components. | Tripped circuit breaker, faulty thermostat, bad transformer. |
Blower runs constantly | The board's fan relay is stuck in the "on" position. | Thermostat fan switch is set to "On," faulty fan limit switch. |
Burners won't light | The board isn't sending a signal to the ignitor or gas valve. | Clogged flame sensor, faulty ignitor, bad gas valve, blocked flue. |
Burners light, then go out | The board isn't detecting the flame and shuts off the gas as a safety measure. | Dirty flame sensor (most common!), cracked heat exchanger. |
Remember, this table is just a guide. Always start with the simplest potential causes—like the thermostat settings or a dirty filter—before assuming the worst.
It’s no surprise that HVAC system repairs are on the rise. The global market for HVAC controls, including these critical circuit boards, was valued at USD 15.18 billion in 2021 and is expected to climb to USD 27.34 billion by 2028. As furnaces get older, this kind of replacement becomes more common. You can read more about this HVAC market trend on GlobeNewswire.
Finding the Right Replacement Board
Alright, you've pinpointed the problem: a fried circuit board. Now comes the real trick—getting the exact right part for your furnace circuit board replacement. Grabbing the wrong one won't just waste your time and money; it can cause your furnace to act up, lead to more damage, or create a serious safety issue. The secret is all in the part number.
First things first, look at the old board. Somewhere on there, either stamped directly onto the green plastic or on a sticker, will be a string of numbers and letters. That's the manufacturer's part number, and it's what you need. It might look something like "CNT07941" on a Trane system or "1172809" if you're working on a Goodman.
A Quick Tip from the Field: Boards are often covered in numbers. You'll see serial numbers, PCB layout codes, all sorts of things. The one you’re looking for is usually the most prominent one, often on a white sticker and sometimes labeled "P/N" or "Part No."
Where to Look for the Part Number
Don't just write down the first number you see. Manufacturers can be tricky, so you need to know where to hunt. For example, a Honeywell board might have a main part number like "S9200U1000," but also a separate PCB number that won't help you order a replacement.
Scan the Edges: Part numbers are often printed right along the outer edges of the board.
Find the Sticker: Companies like White-Rodgers or ICM usually put a sticker with the model and part number right on a large chip or another flat, open area.
When in Doubt, Check the Manual: If a component has burned and the number is impossible to read, your furnace's service manual is your backup. It should list the original part number you need.
OEM vs. Aftermarket: What’s the Best Choice?
Once you have that part number, you have a decision to make. Do you go with an Original Equipment Manufacturer (OEM) board, or do you pick up a universal aftermarket version?
An OEM part is the genuine article, made by (or for) the company that built your furnace. It’s a guaranteed match, a true plug-and-play solution. This is always the safest bet, but it's usually the most expensive one, too.
Aftermarket boards, on the other hand, are made by other companies to work with a whole range of furnace models. They’re a lot easier on the wallet and you can often find them at suppliers like EPS Controls. The catch? You might need to do a little extra work, like setting some tiny DIP switches or moving a jumper wire to get it configured perfectly for your furnace.
Board Type | The Good | The Bad |
|---|---|---|
OEM | Perfect compatibility, simple installation, keeps your warranty intact. | Costs more, can be tough to find for older furnaces. |
Aftermarket | Cheaper, easy to find, sometimes includes newer, updated features. | May need configuration, quality can vary by brand. |
Honestly, going with a quality aftermarket board is a perfectly good way to save some cash, especially if your furnace has a few years on it and OEM parts are getting scarce. The most important thing is to make sure the aftermarket board's description specifically says it replaces your original part number. Always, always double-check that cross-reference before you hit "buy"—it'll save you a world of headaches.
Essential Tools and Safety Precautions
Before you even think about touching a wire or loosening a screw, let's get one thing straight: safety is non-negotiable. When you're working on a furnace, this isn't just a friendly reminder—it's the golden rule. A simple mistake can damage your brand-new circuit board or, far worse, cause serious injury.
Your first move is always the same: kill the power.
Head to your home's main electrical panel and flip the breaker that powers your furnace. Don't just assume it's off. Go back to the thermostat and try to kick the heat on. If nothing happens, you're on the right track. For absolute certainty, I always recommend using a multimeter to test the furnace terminals and confirm there is zero voltage. Trust me, it's a step worth taking.
Assembling Your Toolkit
With the power confirmed off, it's time to gather your gear. You don't need a truck full of professional tools, but having the right items on hand will make this furnace circuit board replacement a hundred times easier. Nothing's more frustrating than having to stop mid-job to hunt for a specific tool.
Here's what I recommend having within arm's reach:
Your Smartphone: Seriously, this is your most important tool. Before you unplug a single wire, take a bunch of clear, well-lit photos of the old board from every angle. Zoom in on the wire connections. This visual record is priceless.
Nut Driver Set: A magnetic 1/4-inch or 5/16-inch nut driver is your best friend here. It's perfect for the hex-head screws holding the furnace panel and the board itself. The magnetic tip is a game-changer—no more dropped screws vanishing into the abyss.
Needle-Nose Pliers: You'll need these to gently grip and disconnect the spade connectors. Wiggling them off is much safer than yanking on the wires and potentially breaking something.
Wire Strippers/Cutters: You might find a frayed wire that needs a clean trim or a new end stripped for a better connection. It’s always good to have these handy.
Multimeter: This is a must-have. You'll use it to verify the power is off before you start and for troubleshooting later if the furnace doesn't fire up right away.
Pro Tip: I can't stress the photo step enough. I've seen even seasoned pros get tripped up by a complicated wiring setup. Your photos create a perfect, custom-made wiring diagram that takes all the guesswork out of reconnecting everything to the new board.
Creating a Safe Workspace
Finally, take a minute to set up your work area. Grab a small cup or a magnetic tray to keep all your screws in one place. Good lighting is key, so bring in a work light or use a headlamp to see into the dark corners of the furnace cabinet.
A clean, organized space helps you think clearly and dramatically reduces the chance of making a simple—but potentially costly—mistake.
Your Guide to Swapping the Circuit Board
Alright, you've got the new circuit board in hand and you’re absolutely certain the power is off. Now for the main event: the furnace circuit board replacement itself. This is where the real work begins, but let me give you some advice I’ve learned over the years—don't rush this part. A slow, methodical approach is what separates a successful repair from a frustrating phone call to a pro.
The goal here is precision, not speed. You're about to disconnect a whole mess of wires, and knowing exactly where each one goes is the key to getting your heat back on without any drama.
This whole process really boils down to three main phases, as you can see here.
We'll follow this exact workflow: document and disconnect the old board, physically install the new one, and then double-check everything before flipping the switch.
Document and Disconnect the Old Board
Before you even think about pulling a wire, grab your phone. Those photos you took earlier are now your best friend.
Start by unplugging the big, blocky plastic connectors (we call them molex plugs). These usually contain a bundle of wires and are designed to only plug in one way, which makes them the easiest part of the job.
Next, you'll tackle the individual spade connectors. These are the single wires that push onto terminals, often labeled with codes like L1 (hot), N (neutral), G (fan), W (heat), and Y (cooling). Use your needle-nose pliers to gently wiggle them off the terminals. Whatever you do, don't just yank on the wire itself—that’s a great way to break something.
With the wires out of the way, you can now remove the board itself. It’s typically held in place by small plastic standoffs or a few mounting screws, usually at the corners. Carefully release those, and the old board should lift right out.
Crucial Tip: I’ve seen this one trip people up more times than I can count. Look closely at the old board for a row of tiny switches called DIP switches. These control specific settings for your furnace, like blower speeds. Your new board will come with these set to a default, which is almost never correct for your system. You must set the DIP switches on the new board to exactly match the old one. Snap a clear, close-up photo of the old switches before you do anything else.
Installing the New Furnace Circuit Board
Putting the new board in is basically the reverse of taking the old one out, but this is where your attention to detail really matters.
Gently set the new board onto its plastic mounting standoffs until it snaps securely into place. Don't force it. If it’s not sitting right, take a second to check its alignment.
Now, pull up those photos on your phone and start reconnecting everything. I like to plug in the big molex connectors first; they give you a nice, stable starting point. Then, move on to the individual spade connectors one by one. This is where those photos become a lifesaver, ensuring the wire for the gas valve actually ends up on the "GAS" terminal.
A loose connection is probably the #1 cause of problems after a board swap. Give each wire a gentle tug after you connect it to make sure it's on there good and tight. A bad contact can cause all sorts of weird issues, so taking an extra minute here is well worth it.
Final Checks Before Powering On
Once all the wires are reconnected, stop. Take a deep breath and do one last visual inspection.
Pull up your "before" photos and compare them to your work.
Are all the wires connected?
Are there any stray strands of copper hanging out that could cause a short?
Is the new board sitting flat and secure on its mounts?
This final once-over is your last chance to catch a simple mistake.
If everything looks good, go ahead and put the furnace access panel back on. Only after the panel is secure should you head back to the breaker box to restore power. The next step is to fire it up and see if your hard work paid off.
Should You DIY or Call a Professional?
When your furnace circuit board dies, the temptation to tackle the replacement yourself is strong. After all, how hard can it be? Buy the part, swap it out, and save a few hundred bucks on labor. But before you dive in, it’s worth taking a step back.
This isn't just about saving money. It's about weighing the cost against the very real risks that come with working on a major home appliance. A simple slip-up can quickly turn a straightforward repair into a far more complex and expensive disaster.
Breaking Down the Real Costs
Hiring a professional HVAC technician isn't just paying someone to plug in a board. You're paying for their expertise. A professional replacement will typically run you between $150 and $450, a price that covers the part, the skilled labor, and—most importantly—an accurate diagnosis. That initial diagnostic fee, usually around $80 to $100, is crucial because it confirms the board is actually the problem before you spend money on a new one. For a deeper look, check out this cost breakdown for furnace repairs on Angi.com.
On the other hand, if you go the DIY route, you might only spend $50 to $300 on the circuit board itself. The savings look great on paper, but that price tag assumes you already own the right tools and, more critically, have the confidence to work with high-voltage components safely.
A professional's fee isn't just for labor; it's an investment in peace of mind. You're paying for their experience, liability insurance, and the guarantee that the job is done right the first time, protecting both your furnace and your home.
The Hidden Risks of a DIY Job
The financial side is just one piece of the puzzle. A simple wiring mistake could fry your brand-new circuit board the second you flip the power back on, instantly wiping out any money you saved. Even worse, a bad installation can damage other expensive components like the blower motor or gas valve, or create a serious safety hazard in your home.
And then there's the warranty to consider. Most furnace manufacturers will void the warranty if parts are installed by anyone other than a licensed technician. That means if a different, more expensive part fails later on, you'll be stuck with the entire bill.
So, before you make a decision, have an honest conversation with yourself about your skills and comfort level.
Electrical Experience: Do you know how to read a wiring diagram? Are you truly comfortable handling electrical components where a mistake could be dangerous?
Furnace Complexity: Is your furnace a newer, high-efficiency model? These often have more intricate wiring and sensors that complicate the job.
Personal Risk Tolerance: What happens if you make a mistake? Are you prepared to be without heat in the middle of winter while you figure out what went wrong?
If you have even a flicker of doubt, calling a professional is almost always the smarter, safer bet.
Your Top Questions After a Circuit Board Swap
Even with a brand-new circuit board installed and the furnace humming along nicely, you probably have a few questions. That's a good thing. The more you know about your HVAC system, the better you can take care of it down the road. Let's tackle some of the most common things people wonder about after this repair.
How Long Should a Furnace Circuit Board Last?
A quality circuit board is surprisingly tough, but it won't last forever. In a perfect world, you can expect it to last anywhere from 10 to 15 years, often the entire lifespan of the furnace itself.
But real-world conditions can definitely shorten that timeline. Things like power surges during a thunderstorm, constant rattling from an off-balance blower fan, or even just high humidity can all stress the delicate electronics and lead to an early failure. This is one reason why regular furnace check-ups are so important—they catch the little problems before they can take out the expensive parts.
What’s with the Blinking Lights on the New Board?
That little blinking LED you see through the furnace cabinet door? That’s the board talking to you. It's a built-in diagnostic system, and its flashes are a specific code.
A slow, steady, or solid light is usually the "all clear" signal, meaning the system has power and is waiting for a command.
A fast, continuous flicker often means there's a call for heat and the furnace is in the process of firing up.
A specific pattern of blinks (like two quick flashes, a pause, then three more) is signaling a specific fault.
Don't panic and try to guess what the blinks mean. There's almost always a sticker on the inside of the furnace door that serves as a decoder ring, telling you exactly what each code signifies.
Expert Insight: Don't be surprised if the new board's blinking pattern is different from the old one. Manufacturers frequently update their diagnostic codes with newer board versions. Always trust the legend on your furnace panel—it’s the source of truth for your specific setup.
Can a Power Surge Really Fry My New Board?
You bet it can. A power surge is public enemy number one for furnace circuit boards. A sudden, powerful jolt of electricity can instantly destroy the sensitive microchips and circuits, putting you right back at square one with another dead furnace.
The good news is that protecting your new board is pretty straightforward. The best line of defense is a whole-home surge protector installed at your main electrical panel. If that's not an option, you can also get a dedicated surge protector just for the HVAC unit itself. It's a small investment to safeguard a critical—and expensive—component.
The push for smarter, more efficient heating and cooling is a big deal in the industry. The entire global HVAC market, which is built on components like these circuit boards, is projected to climb from USD 299.28 billion in 2025 to a massive USD 407.77 billion by 2030. This boom is fueled by new energy regulations that encourage homeowners to upgrade older, less efficient systems. You can dig into the numbers and read more about these HVAC system market projections on MarketsandMarkets.
Keep Reading
Related Articles

What is a VFD in HVAC? A Practical Explainer
What is a VFD in HVAC? A Practical Explainer
What is a VFD in HVAC? Learn how Variable Frequency Drives work, their key benefits for energy savings, and their most common applications in modern buildings.
Aug 7, 2025
Aug 7, 2025

Your Guide to Refrigerant Pressure Temp Charts
Your Guide to Refrigerant Pressure Temp Charts
Master the refrigerant pressure temp chart. This guide explains how to read and use PT charts for system diagnosis, charging, and ensuring HVAC efficiency.
Aug 8, 2025
Aug 8, 2025

How to Read HVAC Wiring Diagrams: A Complete Guide
How to Read HVAC Wiring Diagrams: A Complete Guide
Learn how to read HVAC wiring diagrams with our easy-to-follow guide. Master wiring diagrams quickly and confidently.
Aug 8, 2025
Aug 8, 2025
What is a VFD in HVAC? A Practical Explainer
What is a VFD in HVAC? Learn how Variable Frequency Drives work, their key benefits for energy savings, and their most common applications in modern buildings.
Aug 7, 2025
Aug 7, 2025
Your Guide to Refrigerant Pressure Temp Charts
Master the refrigerant pressure temp chart. This guide explains how to read and use PT charts for system diagnosis, charging, and ensuring HVAC efficiency.
Aug 8, 2025
Aug 8, 2025
How to Read HVAC Wiring Diagrams: A Complete Guide
Learn how to read HVAC wiring diagrams with our easy-to-follow guide. Master wiring diagrams quickly and confidently.
Aug 8, 2025
Aug 8, 2025

How to Read a Refractometer for Perfect Results
Learn how to read a refractometer with our expert guide. Get clear, actionable steps for accurate readings and master this essential skill today.
Aug 10, 2025
Aug 10, 2025

Condenser Fan Motors


Pressure Transducers


Sensors

EBUS Horizontal Outside Air Temp/RH Sensor
Aftermarket Part for AAON ASM01836

EBUS Vertical Outside Air Temp/RH Sensor
Aftermarket Part for AAON ASM01838

Duct Mount Humidity/Temp Sensor
Aftermarket Part for Addison 0843P-0586
Duct Euro Humidity/Temperature Sensor
Aftermarket Part for Addison

Outdoor Humidity/Temperature Sensor
Aftermarket Part for Addison 0843P-0587

Room Humidity/Temperature Sensor
Aftermarket Part for Addison

Outdoor Euro Temperature Sensor
Aftermarket Part for Addison

Suction Line Temperature Sensor
Aftermarket Part for Addison 0843P-0838
Variable Frequency Drives

Microchannel Coils

Circuit Breakers


Refrigeration Parts
Soon
0-250psi
Aftermarket Part for Addison 0515P-0783
0-250psi
Aftermarket Part for Addison 0515P-0783
0-250psi
Aftermarket Part for Addison 0515P-0783
0-250psi
Aftermarket Part for Addison 0515P-0783
0-250psi
Aftermarket Part for Addison 0515P-0783
0-250psi
Aftermarket Part for Addison 0515P-0783
0-250psi
Aftermarket Part for Addison 0515P-0783
0-250psi
Aftermarket Part for Addison 0515P-0783
Condenser Fan Motors
Pressure Transducers
Sensors
EBUS Horizontal Outside Air Temp/RH Sensor
Aftermarket Part for AAON ASM01836
EBUS Vertical Outside Air Temp/RH Sensor
Aftermarket Part for AAON ASM01838
Duct Mount Humidity/Temp Sensor
Aftermarket Part for Addison 0843P-0586
Duct Euro Humidity/Temperature Sensor
Aftermarket Part for Addison
Outdoor Humidity/Temperature Sensor
Aftermarket Part for Addison 0843P-0587
Room Humidity/Temperature Sensor
Aftermarket Part for Addison
Outdoor Euro Temperature Sensor
Aftermarket Part for Addison
Suction Line Temperature Sensor
Aftermarket Part for Addison 0843P-0838
Variable Frequency Drives
Microchannel Coils
Circuit Breakers
Refrigeration Parts
Soon
0-250psi
Aftermarket Part for Addison 0515P-0783
0-250psi
Aftermarket Part for Addison 0515P-0783
0-250psi
Aftermarket Part for Addison 0515P-0783
0-250psi
Aftermarket Part for Addison 0515P-0783
0-250psi
Aftermarket Part for Addison 0515P-0783
0-250psi
Aftermarket Part for Addison 0515P-0783
0-250psi
Aftermarket Part for Addison 0515P-0783
0-250psi
Aftermarket Part for Addison 0515P-0783